
Rhythm Room: Drum Tracing, 5 Brilliant Pencil Moves
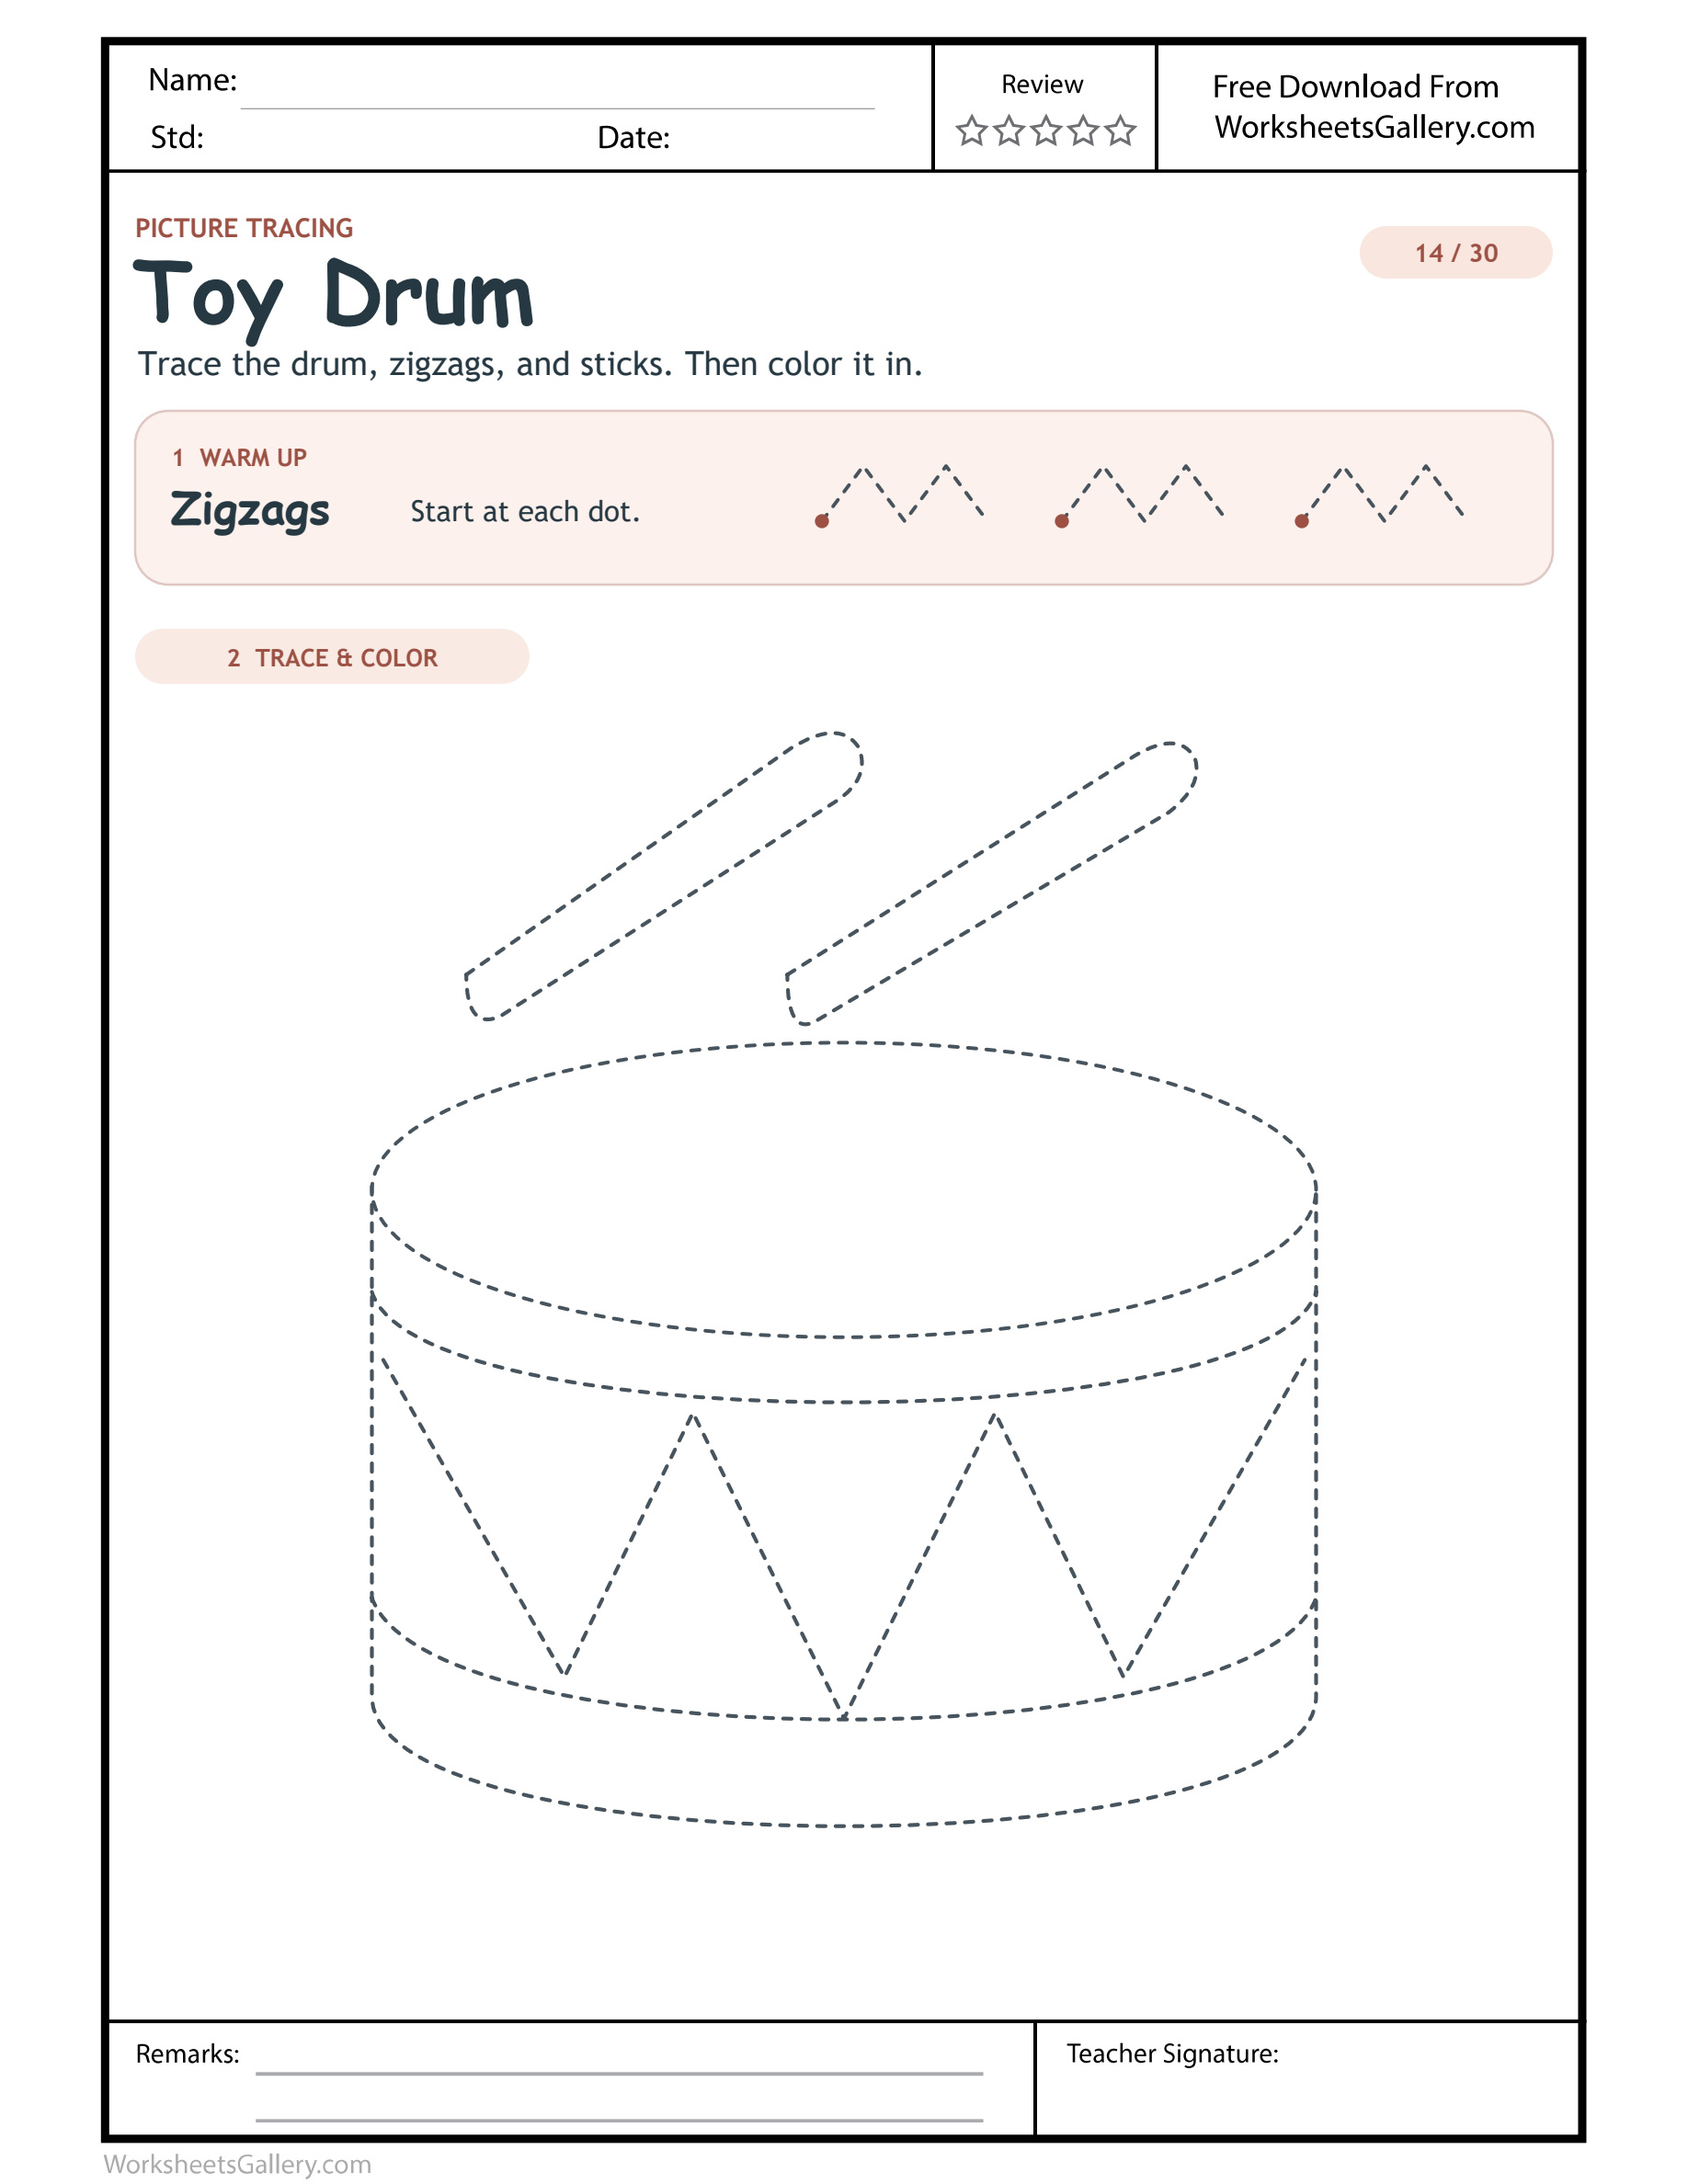
Keep the toy drum printable alongside the other 29 drawings. The collection includes each original activity layout in one clean PDF.
Rhythm travels from a drumstick into a drum. In Drum Tracing, children meet oval rim, zigzag band, base and sticks. Pick out long straight edges of the separate sticks and ask the learner what shape it suggests. A short zigzags warm-up precedes the large drawing. Begin in conversation, then put the pencil to work on one stretch the child chooses. Work toward a picture Noa can point to and describe. Color can make the separate parts easier to see, especially around narrow joins.
The first pencil movement in Drum Tracing

Zigzags is the starter movement for the toy drum sheet.
During a practice pass near the rhythm instruments, have Noa find the printed dot and trace each slant until it meets the next. Explain that a zigzag changes direction sharply at successive points. Follow a dotted example with the finger if the pencil is still getting pressed hard into the paper. The purpose is to see what the direction does. On the large toy drum drawing, find a line that uses a comparable movement and decide whether it asks for the same speed.
Watch where the movement ends. An adult can place a loose paper pointer beside long straight edges of the separate sticks and ask the learner to name the place where the guide comes to a stop. Offer one chance to lift and start again after that landmark. Try changing the size of the movement in the air before deciding how far the hand should travel on the paper.
A home visit and a class turn with Toy Drum
Set a pencil, two crayons and a spare sheet beside the rhythm instruments. Let Noa point to the first part of the picture they would like to finish. Name that landmark together, try one warm-up path, and work on the chosen part while the picture is still upright. Give the print a slight turn if it makes the movement around zigzag peaks across the drum middle feel less awkward.
Start the classroom music circle with a silent look at the large outline. Ask two learners to show different places where the line changes. Set up a practice turn for each learner, with the adult holding a finger near long straight edges of the separate sticks only if it helps to find the route. During the coloring turn, have the children describe one area that should stay separate from another.
For a child around three who is new to pencil paths, choose the most open portion of toy drum sheet and let a fingertip do some of the work. A four- or five-year-old who can track the larger route might try a smaller feature. An older kindergartner can offer a reason for an intentional pencil lift near zigzag peaks across the drum middle. Pick tasks by what the child can explain and comfortably attempt with the tool in hand.
What a color choice reveals at Rhythm Room
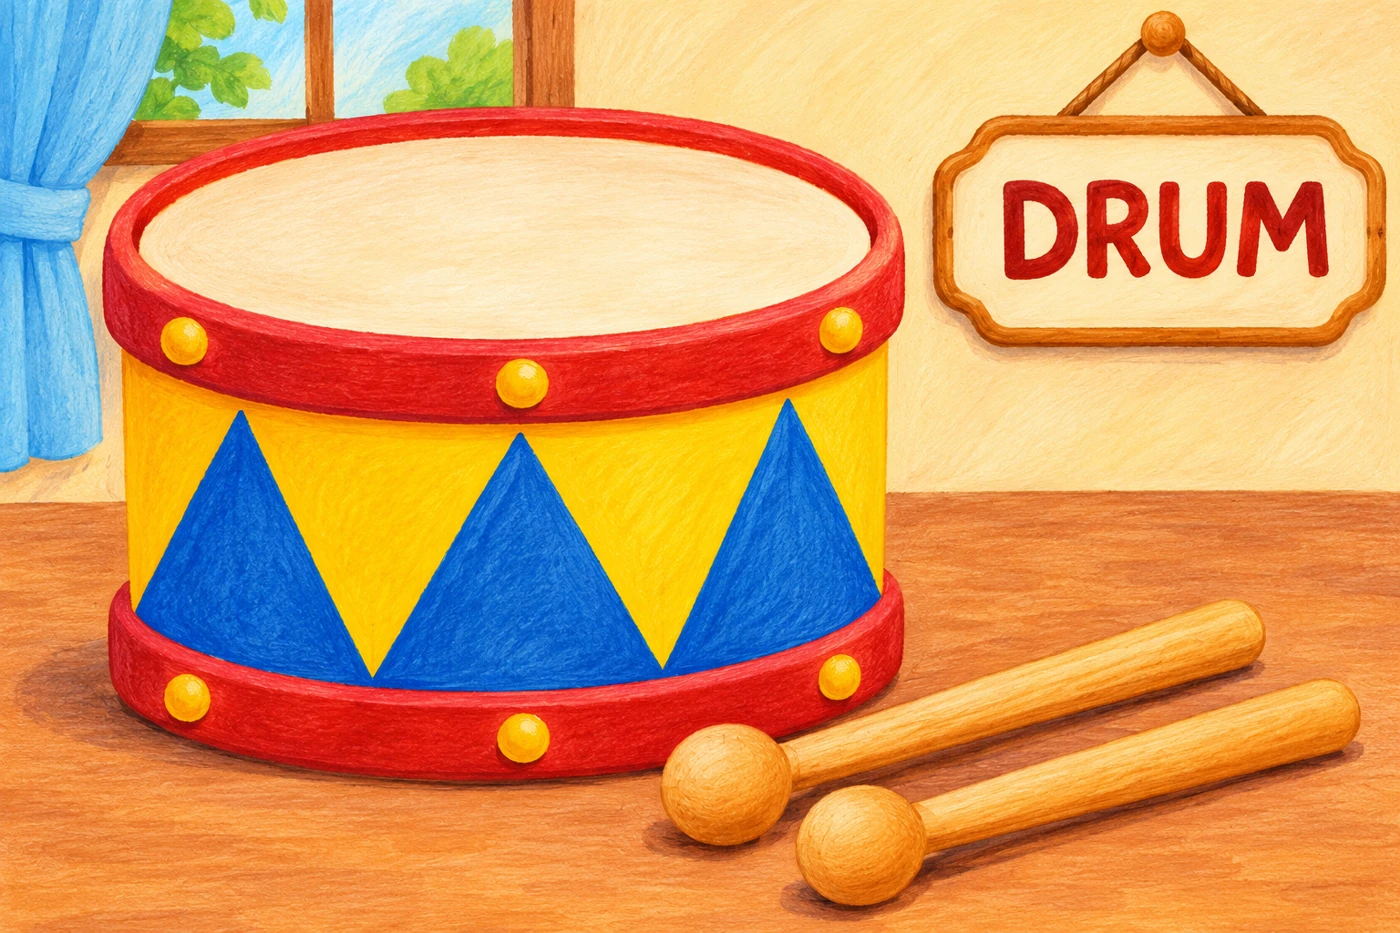
Imagine scarlet rim with blue triangles. Ask what changes near long straight edges of the separate sticks when a new shade touches the neighboring area. A child may choose a surprising combination and still show where one shape gives way to the next. Test the colors on a clean scrap if the region is small. Put the larger coloring areas within easy reach so the child can move the whole arm comfortably.
Tap Noa's drum pattern slowly with a soft tool. Stop over the first high point of a hand-drawn zigzag and resume only after she points downhill. In group work, let one child choose a pair of triangles to color while another locates the rim. Put the paper drumsticks on a separate card for a quick game of naming what sits above the instrument. Their distance from the drum helps show why the pencil lifts there.
Rhythm Room picture notes for grown-ups
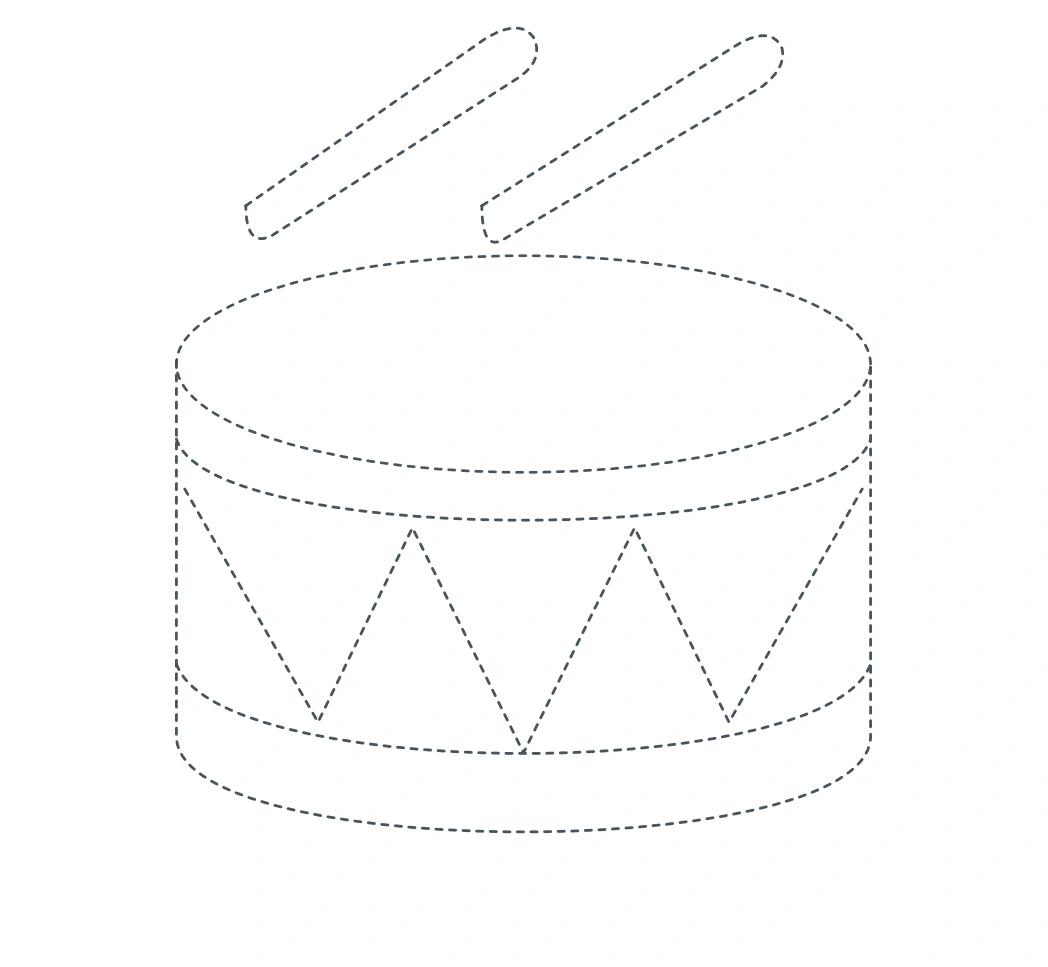
Noa taps a soft and loud rhythm. She draws its highs and lows with her finger above the drum band, then looks for where each pencil turn belongs. Read the printed direction on the toy drum sheet aloud. Trace the drum, zigzags, and sticks. Then color it in. Walk through the labeled parts with Noa and invite a prediction about which requires the tightest turn. Explain that a color choice can wait until the relevant edge is easier to recognize.
An oval at the top of the drum gives it an opening-like surface. The zigzag runs around the middle band, while the two sticks sit above it with air between them. Touch one zigzag valley and check whether the next diagonal should rise or fall before continuing.
At zigzag peaks across the drum middle, look toward the next visible mark before the pencil moves. That practice can make a crowded area easier to navigate. In the classroom music circle, one learner can point to the next mark while a partner describes the change of direction. Make room for a second explanation after the roles switch.
Off-page drawing invitations from Rhythm Room
Build a gesture chain for Toy Drum
Use one movement to represent zigzag peaks across the drum middle and a second for long straight edges of the separate sticks. A partner can watch and say which part of the drawing goes with each gesture. Reverse the order and see whether the same clues still make sense.
Make a movable pointer for Toy Drum
Draw a small arrow on a separate slip. Slide it beside long straight edges of the separate sticks and look where it points. Move it when the route changes, letting a second person describe what would happen if the pencil continued straight.
Use an imaginary instruction card for Toy Drum
At the classroom music circle, let a learner dictate one sentence directing a pretend illustrator toward long straight edges of the separate sticks. An adult can write the instruction on scrap and let another learner follow it. Replace one ambiguous word after hearing a different interpretation.
Cut a viewing window for Toy Drum
Ask an adult to cut a window in a scrap card. Look through it at zigzag peaks across the drum middle. Slide the card aside gradually and decide which marks belong to the same contour as the first detail.
Draw a route with yarn for Toy Drum
Lay a piece of yarn along a surface. Have the child change one section so it feels like the motion used near zigzag peaks across the drum middle. Mark the endpoint with a removable paper circle and ask how the route would feel from the opposite direction.
Make a color sample for Toy Drum
Set out paper strips and compare scarlet rim with blue triangles. Hold each one near the picture separately. The child can decide which pair makes long straight edges of the separate sticks easiest to see and save a tiny sample in the margin of a separate note.
What to observe in the Rhythm Room lesson
- Watch the line ahead Looking beyond the place the pencil touches can help Noa anticipate zigzag peaks across the drum middle.
- Try a steady hand movement A printed sample gives the hand a short place to practice how to alternate between climbing and descending.
- Know where a part belongs Comparing long straight edges of the separate sticks with the picture outline gives a child a reason to read the shape in context.
- Describe a decision Talk through the meaning of words from oval rim, zigzag band, base and sticks while matching them to parts on the page.
- Return after a pause Pick a sensible restart spot in the toy drum sheet and see whether the learner can explain what comes next.
- Select a coloring area Using scarlet rim with blue triangles gives the child a chance to distinguish adjacent regions by a visible choice.
- Compare scale Try trace each slant until it meets the next on a much larger bit of scrap first, then notice what has to get smaller near the toy drum detail.
Write down one thing that Noa said or did around long straight edges of the separate sticks. In a subsequent session at the classroom music circle, use that observation to choose a smaller or broader line. Early drawing makes room for cognitive planning, coordination of the eyes and hand, and the words a learner uses to describe positions. A single filled-in picture gives only part of that account.
A second attempt at the rhythm room detail

When you see a peak being skipped when the direction changes too early, take a pause around zigzag peaks across the drum middle before adding another mark. Ask about the printed line while keeping both the dotted guide and the attempt in view. For Noa, an erasable pencil can make a tiny revision feel possible. A finger-only rehearsal also lets the learner solve the route separately from pressing on a tool.
Return to one toy drum sheet action on a calm day. Near the rhythm instruments, offer a choice of finding the dot, showing long straight edges of the separate sticks, or trying a crayon in the largest clear area. Brief visits can be easier to repeat if they end with a recognizable feature the learner can talk about. Let the child name an upcoming step on a slip of paper and keep it beside the drawing.
| Where | What to look for | What to try |
|---|---|---|
| At zigzag peaks across the drum middle | Check for a peak being skipped when the direction changes too early. | Ask the learner to find the printed point before continuing downhill. |
| Near long straight edges of the separate sticks | Check whether Noa knows which route belongs to the part. | Offer a temporary paper pointer at the place they want to reach. |
| After an attempt at toy drum | Check how much pressure the tool needed in the smallest region. | Test a lighter mark beside the printed zigzags examples. |
Where to go after the Rhythm Room drawing
If the child wanted to stay with zigzag peaks across the drum middle, open zigzag copying on a point grid. For a fresh tracing start, a simpler set of tracing paths gives space to rehearse foundational directions. Try a low turning curve when Noa can explain how one kind of path differs from another. The Head Start guidance on hand and eye coordination offers additional ways to include drawing tools in everyday play.
Use the free download button for the original toy drum PDF with the site credit. With an eligible membership, open the clean version to get the same sheet without the watermark or promotional text. The $4 collection brings this activity together with all 29 other printables.
Check portrait US Letter paper and preview at Actual Size or 100% before sending the toy drum sheet to print. Look closely at the dashed lines near long straight edges of the separate sticks. If they are hard to see, try a standard quality print. Start with one sheet for Noa and set out a pencil and the colors the learner wants to use.
Related Topics
Popular Worksheets
Printable resources families and teachers are downloading now.
 Free
 Free
 Free
 Free