
Mountain Mark Trails: 5 Powerful Peak-and-Valley Games
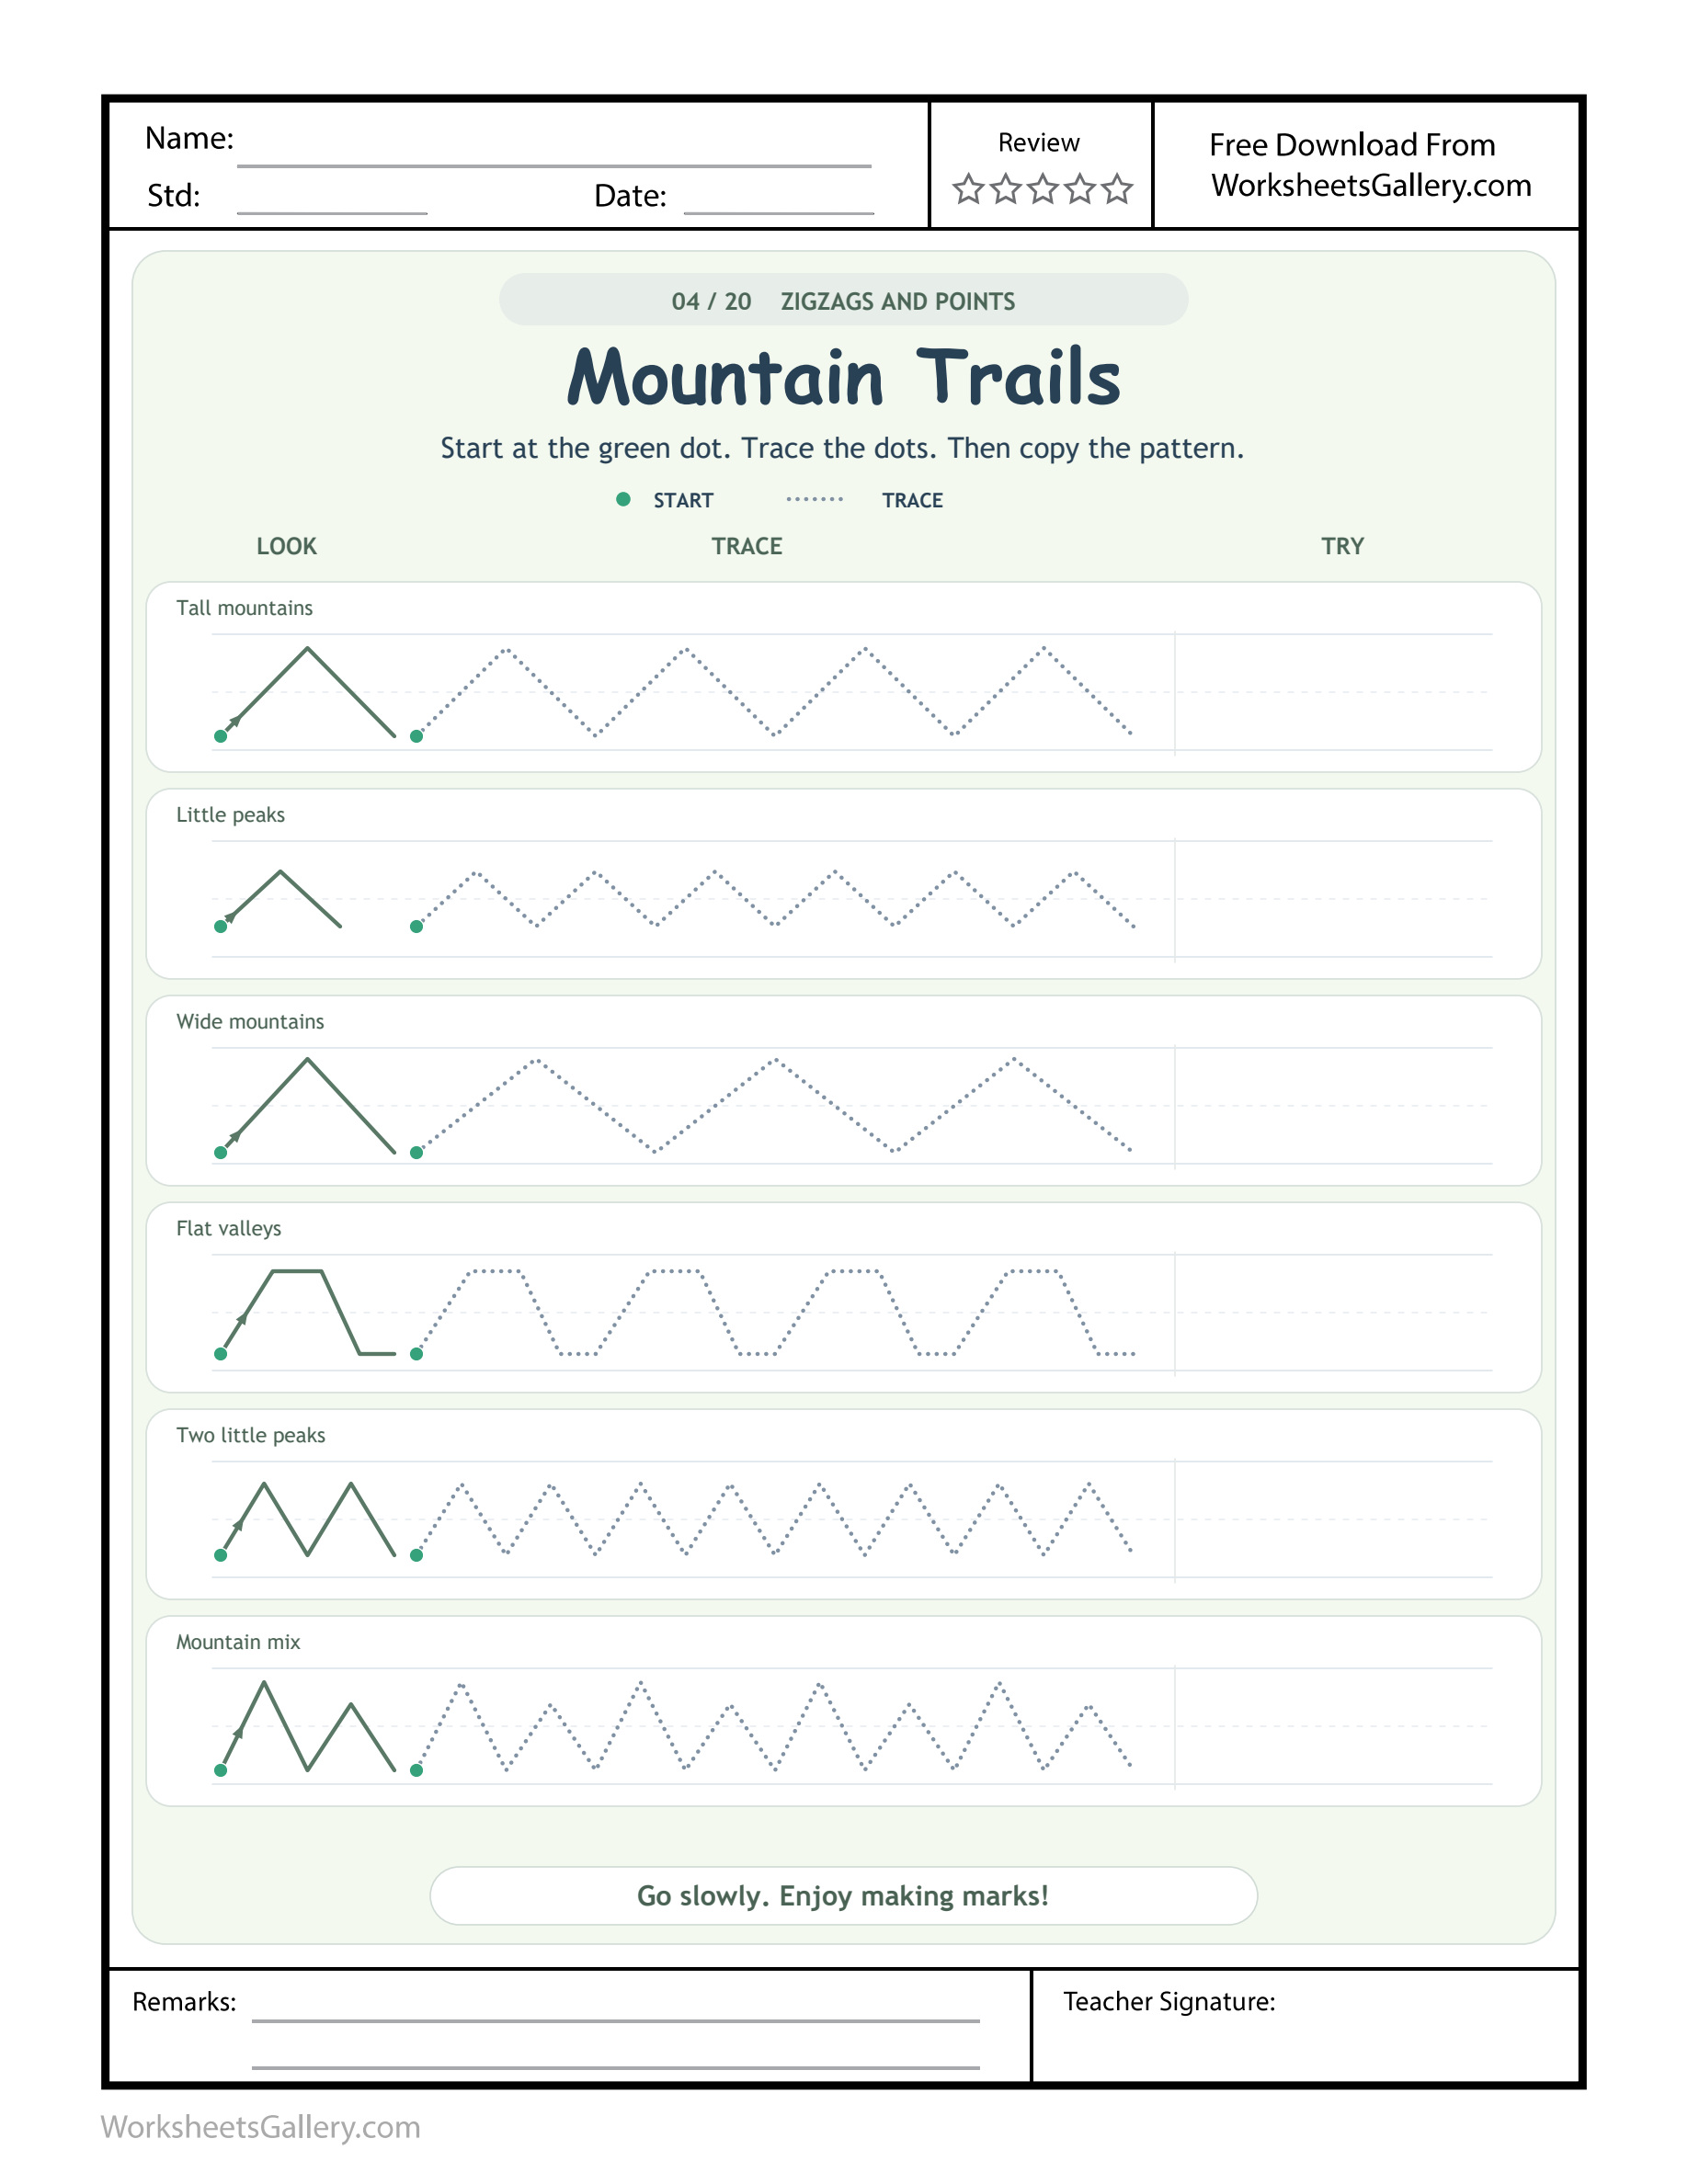
At a mountain peak, the pencil needs a new plan. Mountain Mark Trails explores that moment through pointed zigzags, level stretches and a route that mixes peak heights. The Mountain Trails worksheet gives each pattern a solid example, a dotted middle and space for a short independent continuation. Its green markers show where to begin, while the shape ahead suggests when to change direction. Treat the page like a set of routes to inspect rather than a race across six rows. One well-noticed corner can provide a useful starting point for the next mark.
Choose a Mountain Mark Trails route before a pencil
Look across the six labels and select something that attracts the learner. Tall mountains and Little peaks introduce pointed changes. Wide mountains offers another named zigzag example. Flat valleys includes level sections, while Two little peaks and Mountain mix invite attention to repeated or changing peak heights.
Mountain Mark Trails is mark-making practice, with no letters to identify or number answers to complete. The child follows a route and then tries a brief copy. An adult can read its labels and describe a visible feature without turning the drawing invitation into a reading test.
Prepare the Mountain Mark Trails printable edition
The original sample preserves the uploaded worksheet presentation. A separate clean member file removes its website name, domain markings and watermark. Choose the premium PDF from this page after signing into an account with a currently eligible membership. The printable member activity contains no ads; web-page advertising is a separate matter.
Mountain Mark Trails prints on one US Letter sheet. Inspect the saved document before printing, particularly the small dotted patterns and right-hand TRY areas. If your paper has different proportions, use a fit setting that retains every page edge. Leave those independent spaces unchanged so they remain genuine opportunities to make a mark from observation.
Mountain Mark Trails separates a corner from a curve
Trace the solid mountain model with a finger. One straight slant rises toward its peak; a new slant travels away. At their meeting, the direction changes sharply. The route is different from a smooth wave, where turning happens gradually through a rounded bend.

Mountain Mark Trails gives that distinction a visible purpose. Ask what movement comes after the peak before starting the dotted attempt. A short pause for looking is welcome. The aim is to retain a recognisable pointed change, not to insist that the child's line has the exact printed angle or length.
Noor finds a Mountain Mark Trails resting ledge
For Mountain Mark Trails, Noor and her mother build a pretend paper campsite. Noor chooses the Flat valleys row because its little level stretches look like places where a traveller might rest. Her mother follows the model in the air, naming slant, flat, slant and flat. Noor describes the sequence in her own words before drawing.
Their Mountain Mark Trails session begins with something Noor noticed independently. They do not need an error to start a useful conversation. After one dotted route, she makes a short continuation in TRY and points to its level section. Her mother records that observation as a reason to offer another mixed straight-line task later.

Seven Mountain Mark Trails observations with a purpose
- A chosen beginning: the green marker gives the movement a definite place to start before the slants begin.
- A next-direction decision: looking ahead to a peak or valley links visual information with an intended turn.
- A straight segment: travelling along one slant differs from turning at the meeting between slants.
- A level interval: identifying a short flat makes a mixed route more than an automatic zigzag.
- A shape comparison: noticing a tall-small relationship involves observing how neighbouring parts fit together.
- A spoken route: words such as rise, turn and across let the child explain a movement to someone else.
- A self-made continuation: the learner carries an observed feature into their own mark instead of relying only on printed dots.
Mountain Mark Trails can offer evidence of these choices without supplying a general handwriting score. Look at the child's plan, their physical route and the help used during the attempt. Those observations can suggest a useful next invitation.
A Mountain Mark Trails route map for an adult
The Mountain Mark Trails labels name six printed invitations. Use the actual examples when discussing size or spacing, rather than assuming the rows form a measured progression in difficulty.
| Source label | Feature to inspect |
|---|---|
| Tall mountains | Slants meet at pointed peaks. |
| Little peaks | A smaller model retains directional changes. |
| Wide mountains | Follow the displayed zigzag spacing. |
| Flat valleys | Level portions interrupt the slants. |
| Two little peaks | A short paired motif can be observed. |
| Mountain mix | Different peak heights belong together. |
In Mountain Mark Trails, each row has its own LOOK example and TRACE route before the open TRY end. Reading the row afresh helps prevent the previous movement from replacing the one currently shown.
Use Mountain Mark Trails at home as a route designer
Offer paper and a comfortable drawing tool on a steady surface. Read the selected label and look at its solid model together. Ask the child to show where the route begins and where the first directional change will happen. A finger demonstration can precede a pencil attempt if useful.
For Mountain Mark Trails, invite one dotted motif rather than a compulsory whole row. Let the learner inspect the resulting mark and choose whether to continue, try a short copy or stop. Support paper stability without steering the drawing hand. The child needs an opportunity to make the directional decision, even when an adult describes it aloud.
Mountain Mark Trails invites a classroom trail committee
Give a small group two jobs: select a route for a pretend traveller and describe its turning points. One child may prefer the flat sections; another may choose the mixed heights. They can explain their choices using the solid models while a teacher asks what would change in the hand movement.
Mountain Mark Trails drawing can follow that planning conversation. The Mountain Mark Trails teacher might notice a child naming every turn accurately but rounding the corners physically. That suggests a short larger-scale turn demonstration, rather than more vocabulary questions. Another learner may need help noticing the flat section before moving the pencil. The same sheet can support different observations.
Mountain Mark Trails mistakes deserve a local question
A rounded peak may show that the child continued curving instead of changing to a new straight slant. An omitted flat may show the learner carried a familiar zigzag into a mixed row. Ask where the next change appears in the model. Give the child time to inspect rather than immediately redrawing the route for them.
Mountain Mark Trails does not require erasing every mark that departs from the dots. Choose one feature for the next attempt. A freehand continuation can preserve a pointed turn or flat interval without matching printed dimensions. Look for that relationship first, then decide whether another observation would be helpful today.
Five Mountain Mark Trails games for a paper expedition
1. Name a Mountain Mark Trails turning landmark
An adult points near a printed peak or valley and invites the child to describe what the route does there. They may say “turn back down” or show it with a finger. Mountain Mark Trails gives the landmark a movement meaning. Avoid asking for several specialist terms before accepting a clear demonstration of the route.
2. Make a Mountain Mark Trails flat-stop card
Draw a short mixed route on separate paper and label it SLANT AND FLAT. The child highlights or points to its level portion, then makes a new small route containing the same feature. Mountain Mark Trails now connects observing a particular interval with designing one. The additional card is a play example, not an altered worksheet row.
3. Build a Mountain Mark Trails paper ridge
Arrange sturdy paper strips into two slants meeting at a peak. Let a child move one strip to change the angle while retaining the point. Compare the construction with a source example. Mountain Mark Trails can introduce the idea that several pointed routes share a feature even when they do not look exactly alike in size.
4. Give Mountain Mark Trails a spoken travel plan
One learner describes a short route with “up, down, flat” while another sketches it on scrap paper. Compare the message with the drawing and clarify one instruction if necessary. The activity gives language a practical job. Keep the sequence brief enough that remembering a long speech does not obscure the intended movement decisions.
5. Choose a Mountain Mark Trails mixed-height ending
Look at Mountain mix, then draw one taller and one smaller peak on a separate display card labelled HIGH AND LOW. Ask which part of the model inspired the pair. Mountain Mark Trails offers a new design purpose for copying a relationship. The child can stop after the pair instead of extending a pattern beyond their current interest.
Mountain Mark Trails keeps the mixed example visible

The final Mountain Mark Trails row calls for looking at more than the presence of points. Neighbouring peak heights differ in its model. A child can retain that tall-small contrast in a short TRY continuation while making their own version of the route.
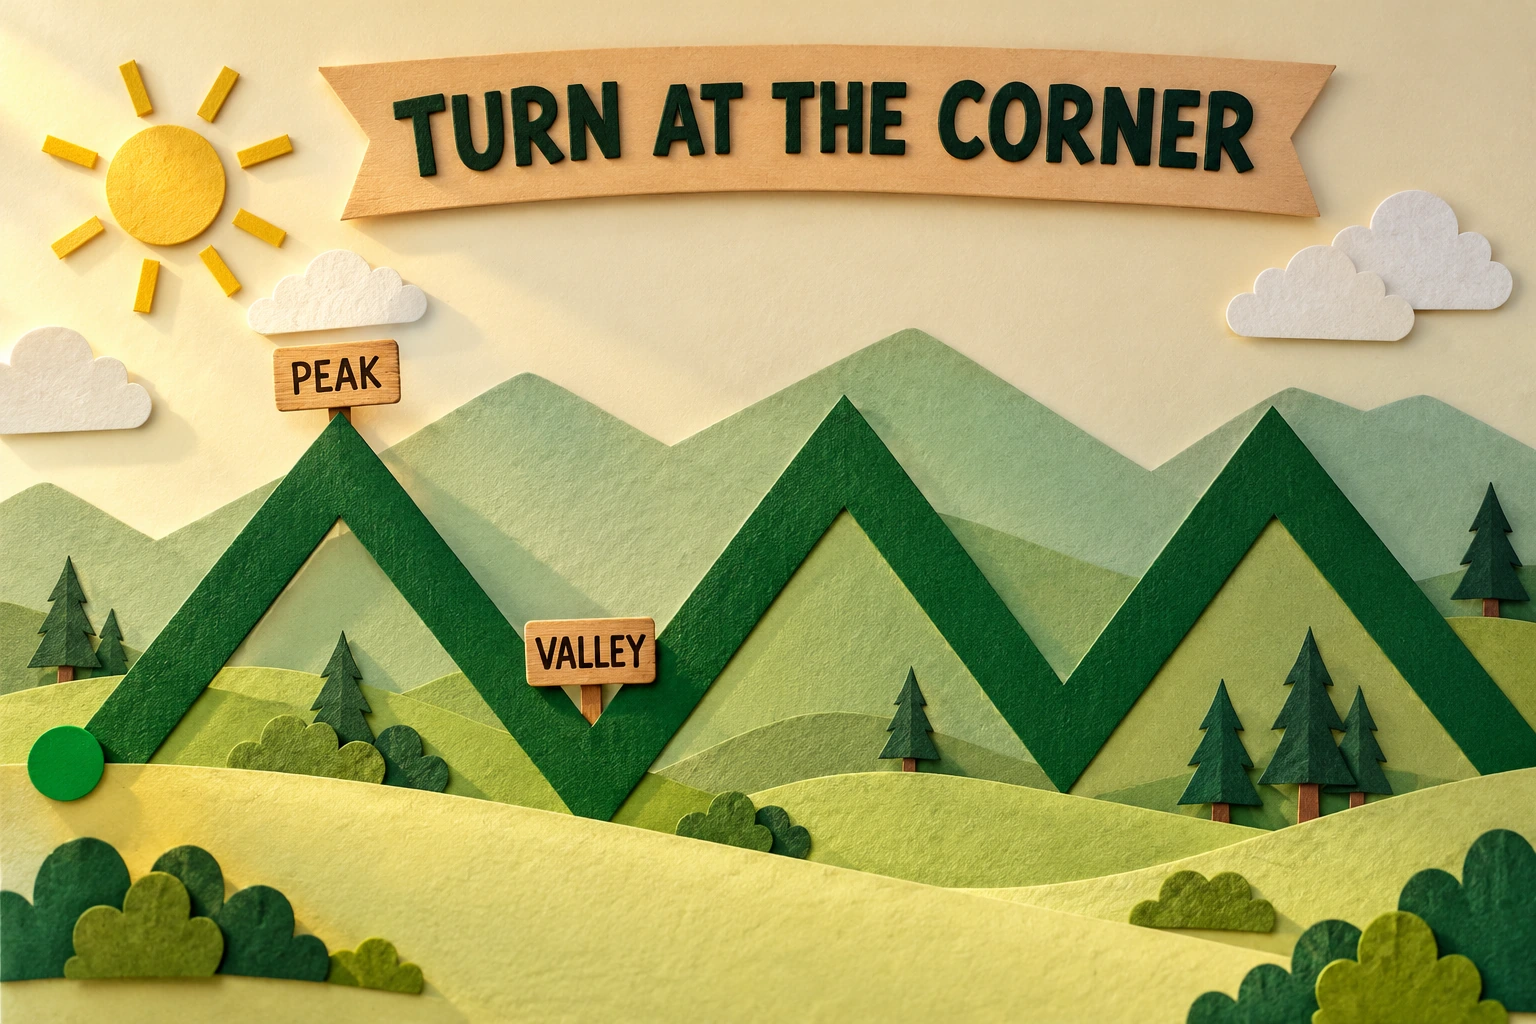
The separate Mountain Mark Trails paper-ridge illustration supplies readable PEAK and VALLEY landmarks. Mountain Mark Trails uses them for discussion about corners. It is an additional demonstration; the faithful source images retain their dotted guides and intentional independent drawing areas.
Make Mountain Mark Trails manageable for the learner
This supported drawing task can be offered to children roughly three to six, in preschool or early kindergarten, when an angular route feels interesting. Some learners need a broad movement on spare paper first. Others prefer a small finger rehearsal. Choose by what the child can attend to comfortably, rather than by requiring a particular row because of their age.
Mountain Mark Trails combines visual observation, directional language, attention and hand control. A child may explain a peak before steering one neatly. Keep understanding and pencil precision visible as separate observations. Offer an easier-sized route or a rest when needed. “Your traveller found the flat ledge” names a specific feature the child included.
Return to Mountain Mark Trails for a new observation
On a later visit, change the job: notice a level section, describe a mixed-height pair or make one independent point. A fresh observation can be more engaging than repeating the entire page. Let the learner decide which route deserves another expedition, and finish while there is still interest in the drawing.
When letters become relevant, letter-M tracing, letter-W practice and a letter-V route offer other uses for joined slants. Adult resources include NAEYC's guidance for writing at home and the PBS Parents age-four literacy page. Mountain Mark Trails can remain one enjoyable drawing choice among those wider opportunities.
Popular Worksheets
Printable resources families and teachers are downloading now.
 Free
 Free
 Free
 Free