
Star Point Drawing: 4 Wonderful Crossings to Copy
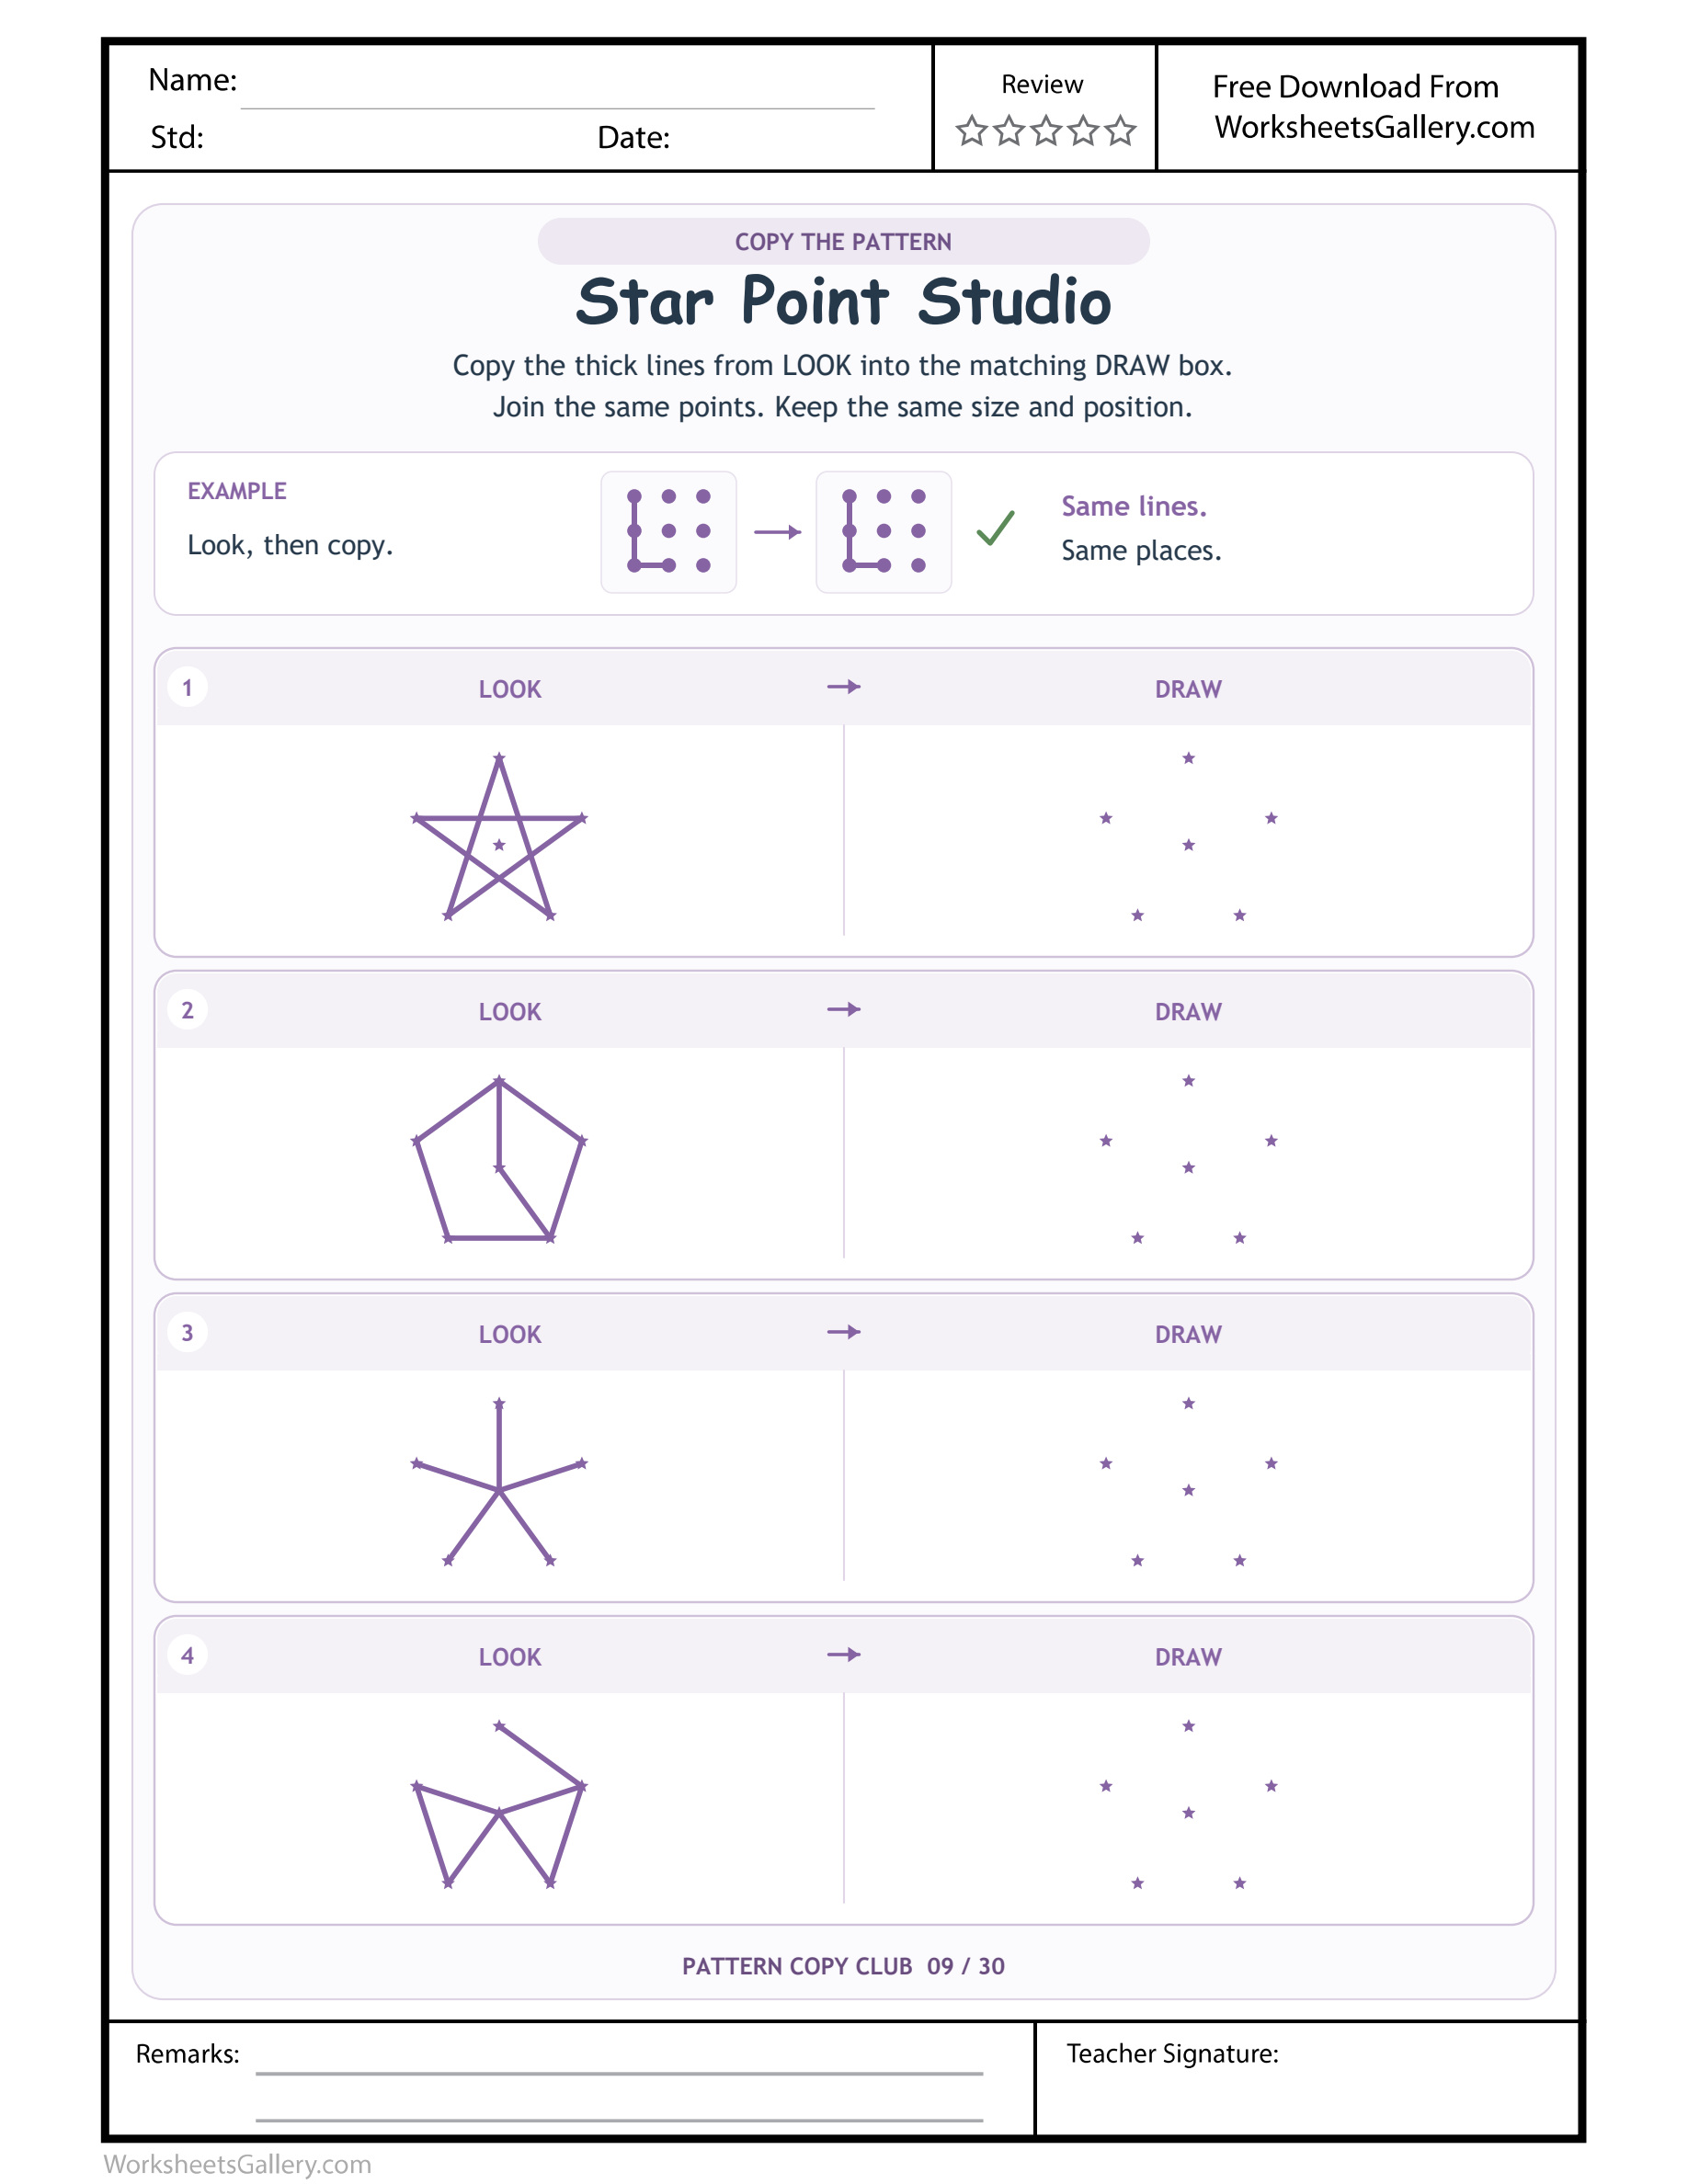
Star Point Drawing: Follow star-point relationships, including open rays and crossings that have no printed dot.
Crossing lines can look like new corners even when the pencil should continue straight. Star Point Drawing explores that distinction through four purple designs arranged around five outer star points and a centre. Children copy each bold model into its matching DRAW field, with a completed example available above. The Star Point Studio sheet includes a crossing star, a divided outline, open rays and an angular wing-like figure. Choose this printable for a child ready to compare a line's destination carefully, rather than assuming every intersection or nearby marker requires another turn.
A star field is more than a star outline — Star Point Drawing
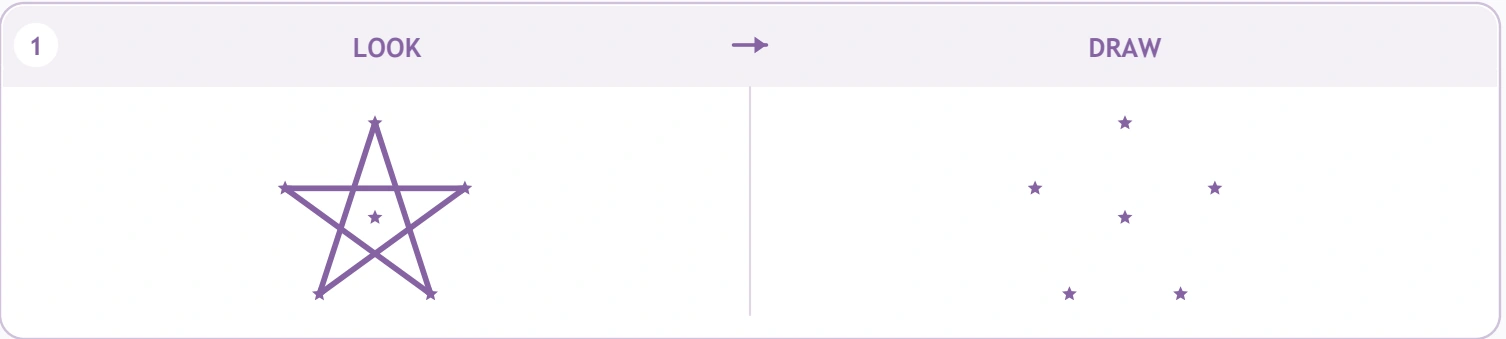
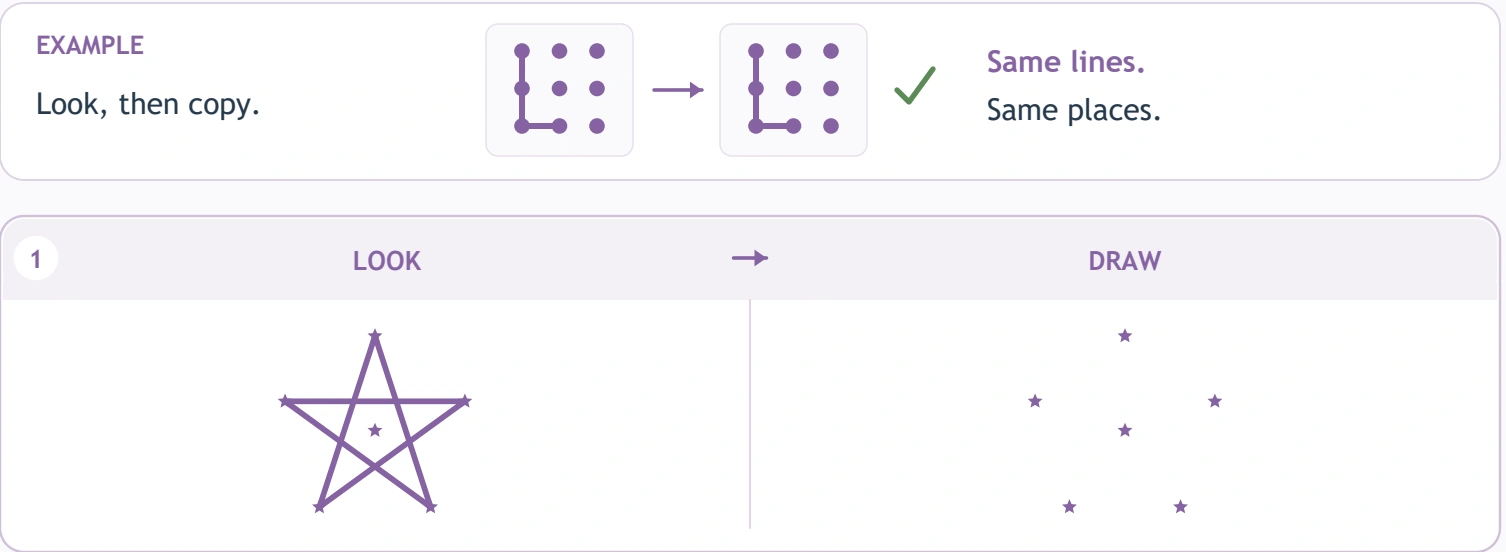
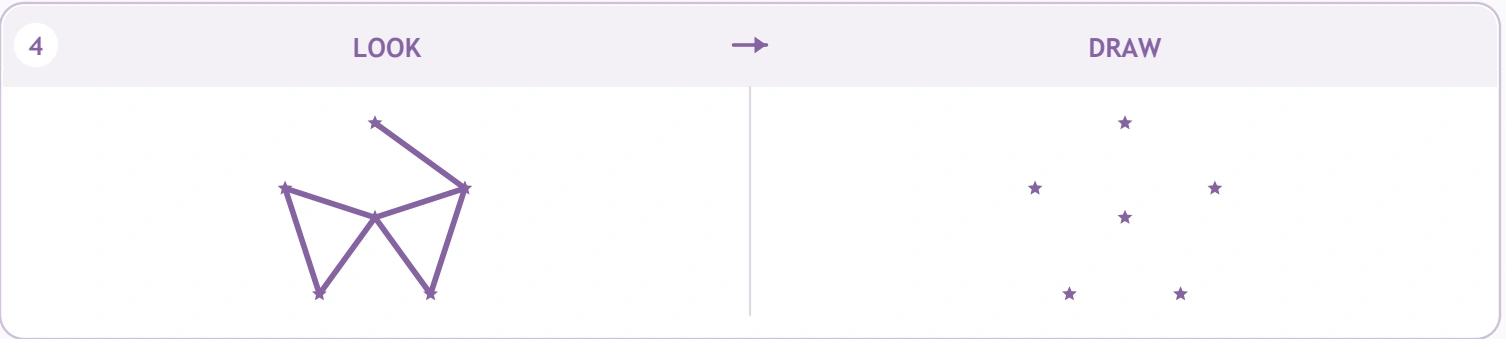
The point arrangement in Star Point Drawing stays recognisable while the selected lines change. Five outer markers and a central marker provide six locations. The first model uses crossing slants to make a five-point star; the third sends separate rays outward from the centre instead of tracing that same closed-looking figure.
That contrast gives Star Point Drawing its teaching focus. A child should inspect which points a particular stroke joins, not draw a memorised star in all four boxes. Follow the printed connection past a crossing when it stays straight. An intersection without a marker does not automatically become another endpoint or a required pencil stop.

Four different uses for the same point family: Star Point Drawing
| Star Point Drawing pair | Visible Star Point Studio model | Model structure |
|---|---|---|
| 1 | Five-point star with crossing lines | 6 anchors / 5 bold pieces in Star Point Studio |
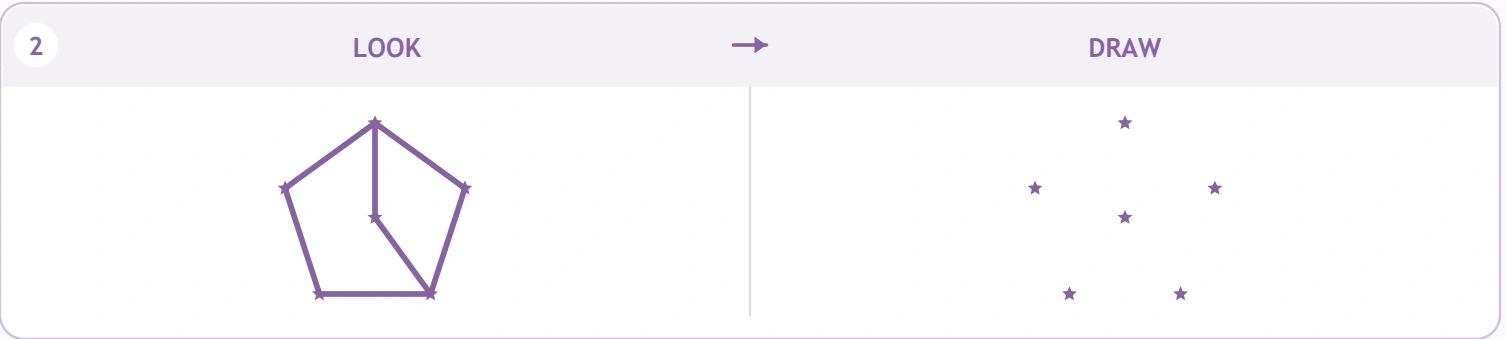
| 2 | Pentagon with two inner segments | 6 anchors / 7 bold pieces in Star Point Studio |
| 3 | Five separate rays from the centre | 6 anchors / 5 bold pieces in Star Point Studio |
| 4 | Two angular wings joined near the middle | 6 anchors / 7 bold pieces in Star Point Studio |
The Star Point Drawing line totals describe the bold model segments. They do not add imaginary points at every overlap. Some designs use the centre, while others leave it unused. The child can look back as often as needed, begin at a clear landmark, using pencil lifts to separate different parts without changing the copying goal.
Compare the crossing star with the open rays
In the first Star Point Drawing model, a long slant can pass across another stroke before reaching its destination. Ask the child to point to both ends of that slant. Once those anchors are identified, its direction becomes easier to preserve despite the visual distraction in the middle.
The ray model asks for a different action: several separate outward connections share a centre. It does not need an outside boundary. A learner may be tempted to connect the tips into a complete shape. Return to LOOK and compare whether that proposed outer line is actually present. Star Point Drawing rewards selective copying rather than making every design more symmetrical or complete.
Begin with a spoken inspection: Star Point Drawing
Place Star Point Drawing where both reference and answer field remain visible. Read the directions aloud and inspect the little L demonstration. Explain that its two boxes agree in position even though the practice field below uses a different point arrangement. The demonstration teaches transfer, not the shape of each answer.
Choose one model and name a useful landmark: highest point, low-left tip or centre. Locate that landmark's partner in DRAW. Then decide which second point the intended stroke reaches. A child who can point accurately but is hesitant with a pencil may benefit from an adult making a similar large movement on spare paper first.
Age and readiness for visual crossings
Preschool and early-primary learners around four to seven may enjoy Star Point Drawing with appropriate support. Looking through overlapping slants can be harder than identifying an ordinary triangle. Offer the open ray model first if the crossing star feels too visually crowded, and let the child compare a small part rather than attempt every line immediately.
Readiness includes comfortable short-line drawing and interest in checking a reference. It does not require a memorised star-drawing trick. Keep Star Point Drawing available as one option, and accept that a learner may prefer stick constructions on a day when small pencil work feels tiring.
Six things an adult can notice: Star Point Drawing
- Line continuity. The learner keeps a slant on course while another line passes across it.
- Endpoint selection. Outer tips and the centre have distinct roles rather than being interchangeable stops.
- Selective closure. Open rays remain open instead of gaining an unprinted outer ring.
- Component planning. A child groups a few related strokes and deliberately restarts when the model calls for another branch.
- Orientation language. Descriptions such as highest tip or lower-right point clarify which location the child intends.
- Review confidence. Comparing one missed connection gives a specific way to revise without rejecting the entire drawing.
These Star Point Drawing observations concern the process as well as the finished pattern. A wobbly stroke with the right endpoints can show a sound spatial decision. Discuss that accuracy first, and offer another attempt at steadiness only when the child is willing.
Ivo's string-art shelf at home, imagined: Star Point Drawing
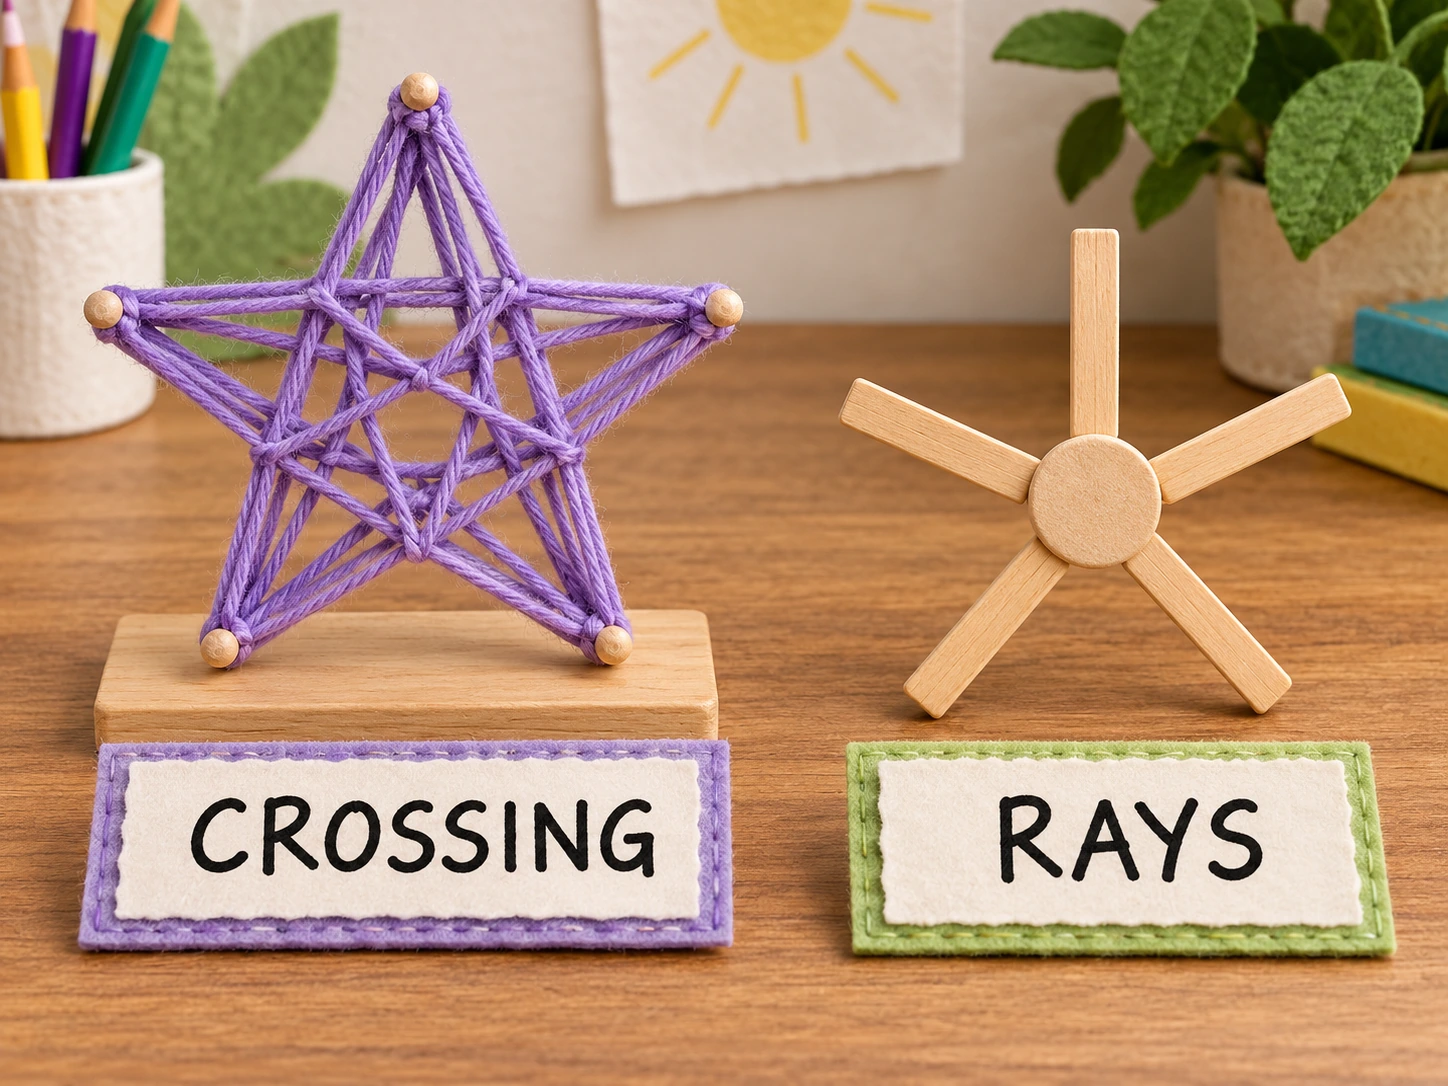
Imagine Ivo inspecting a yarn star with an adult. They follow one thread through its overlap without changing direction. When Star Point Drawing appears beside the craft, Ivo notices that a crossing in the first model is not marked as another star point.
This imagined home conversation is an example of use, not evidence of a child's outcome. The adult can help Ivo select two printed tips and copy the slant between them. After one Star Point Drawing comparison, the yarn construction can become free art again, with no requirement to reproduce the worksheet as a physical craft.
A classroom discussion with two contrasting models
For a possible class activity, compare the first and third Star Point Drawing designs before distributing pencils. Ask what the centre does in each. Children can describe a crossing or point to the place where rays meet, using gestures if the vocabulary is unfamiliar.
Learners then choose a model on individual sheets. The teacher observes whether a child continues a slant to its endpoint or adds an unnecessary turn at an overlap. A brief note about that decision offers a clear next step. Star Point Drawing need not become a test of who already knows how to draw a decorative star from memory.
Five star-studio games
Follow one ribbon through another
Cross two broad ribbons on a table. Trace one from end to end with a finger while ignoring the other temporarily. Then switch ribbons. The physical demonstration provides a large, clear version of the continuity decision in Star Point Drawing.
Build a centre-and-tip sculpture: Star Point Drawing
Arrange five broad spokes around a large central disc. A partner copies just three selected spokes, leaving the others absent. Discuss how an open arrangement can be complete when it matches the chosen reference. Keep small loose materials adult-supervised as appropriate.
Give the tips stage names
On a large homemade star field, let a toy visit the highest, leftmost or low-right location. The child narrates the journey. This story develops spatial descriptions without imposing a numbered route on the printed Star Point Drawing activity.
Curate crossing and meeting examples: Star Point Drawing
Make two stick arrangements: one in which sticks overlap partway along their length and one in which their ends meet. Compare the difference. Relate the observation to the model before asking for another small pencil copy.
Create a constellation invention: Star Point Drawing
After an exact Star Point Drawing attempt, invent an original line picture on separate paper. Give it a spoken name and describe one unusual join. The child can enjoy free design while understanding that the printed exercise asks for correspondence with a visible model.
Untangle common misunderstandings: Star Point Drawing
In Star Point Drawing, children sometimes add a centre dot at every crossing, connect all outside tips, or copy a ray arrangement as one closed pentagon. Ask the learner to locate the source line that supports a proposed addition. If there is none, explain that the idea belongs in a separate invented picture.
Another mistake is reflecting the wing-like final design because its right-hand position suggests a mirror. Keep the model facing the same way. Compare a distinctive upper branch before judging the rest. A single corrected landmark can make the intended orientation much clearer than a general request to start again.
Return for a different kind of star decision
The varied models give Star Point Drawing several entry points. One visit can focus on keeping a line straight through a crossing; another can focus on stopping rays at their tips. Let the learner choose the next comparison and decide how many strokes to attempt.
Encouragement can name what changed: “You followed that line all the way to its tip.” Save a dated attempt if the child wants to revisit it, and alternate paper sessions with string, construction and story play. Regular Star Point Drawing practice can be brief, with breaks accepted as part of a comfortable learning routine.
Download a clear star-point printout
The free sample option supplies the uploaded Star Point Studio original. To obtain the clean premium Star Point Drawing file, use your account's eligible active membership and request the premium variant. Its PDF removes website watermark, domain lettering and promotional ads while keeping the six-point fields and all model lines intact.
The collection card on this page leads to the complete clean set at $3. Obtain the file your access permits and print one page on US Letter at Actual Size or 100%. Check that the complete border appears in the preview. Retaining Star Point Drawing's intended scale makes the small intersections and tips easier to inspect.
Broaden the looking-and-making routine: Star Point Drawing
Compare Star Point Drawing with Drawing Size Choices. After Star Point Studio, try Shape Border Journeys. For Star Point Studio, consider Path Copy Thinking.
For hands-on play surrounding Star Point Drawing, browse NAEYC's family articles about play. Adults seeking more everyday activities can visit the PBS Parents learning resource pages. These external educational links are optional companions without suggesting approval of this product.
Popular Worksheets
Printable resources families and teachers are downloading now.
 Free
 Free
 Free
 Free