
Cube Corner Mapping: 4 Clever Spatial Sketches
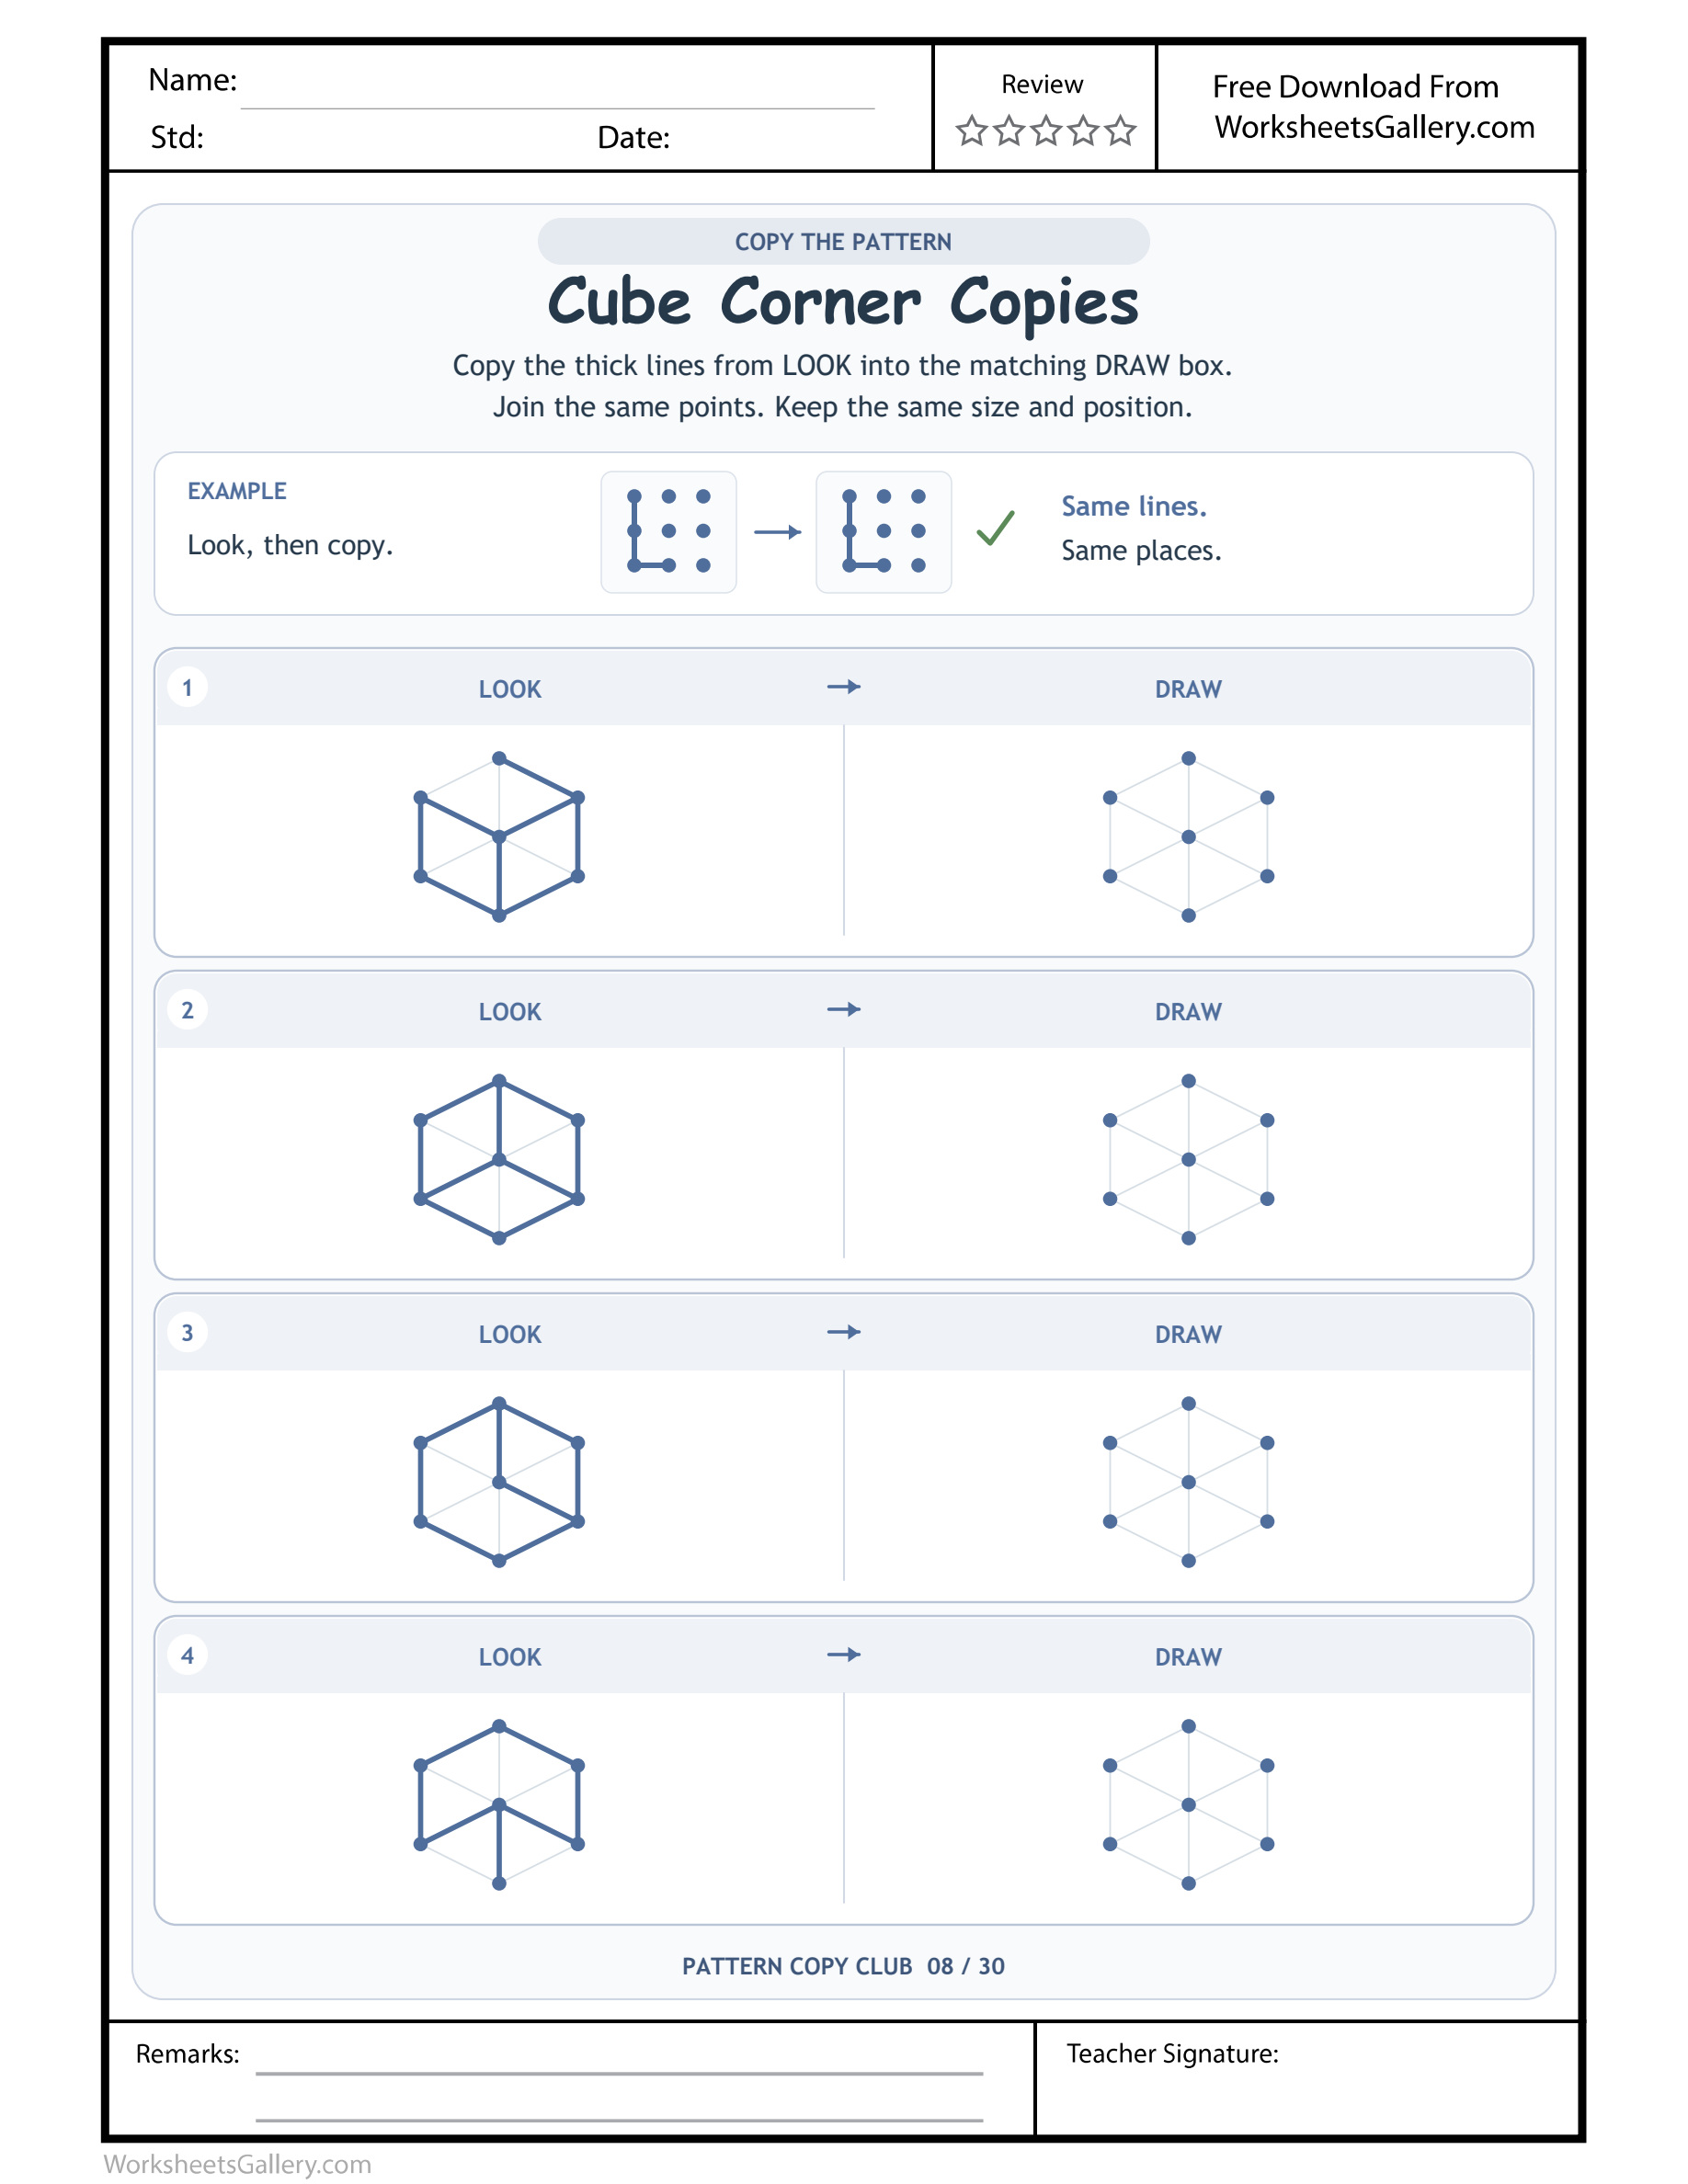
Cube Corner Mapping: Match central junctions in cube-like designs without flipping their orientation.
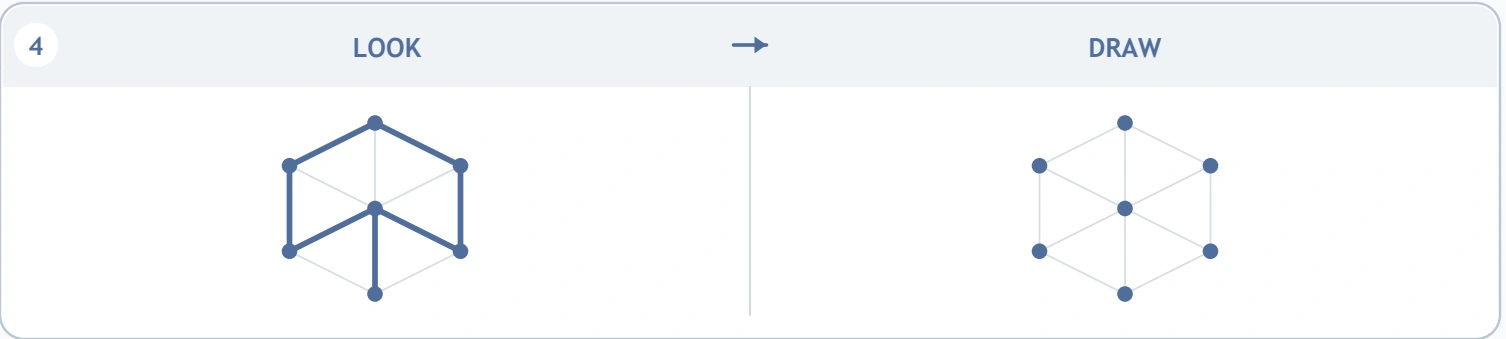
Junctions can make a flat drawing look surprisingly solid. Cube Corner Mapping uses seven-point arrangements to build four blue cube-like designs, each paired with an identical pale guide for copying. Children inspect the bold edges in LOOK and add the corresponding strokes in DRAW, keeping the central joins and outside connections in place. The Cube Corner Copies source includes a worked example before the practice panels. This printable offers a small spatial puzzle for a learner who can draw short lines and is ready to notice how several edges meet at one shared point.
Begin by finding the meeting place — Cube Corner Mapping
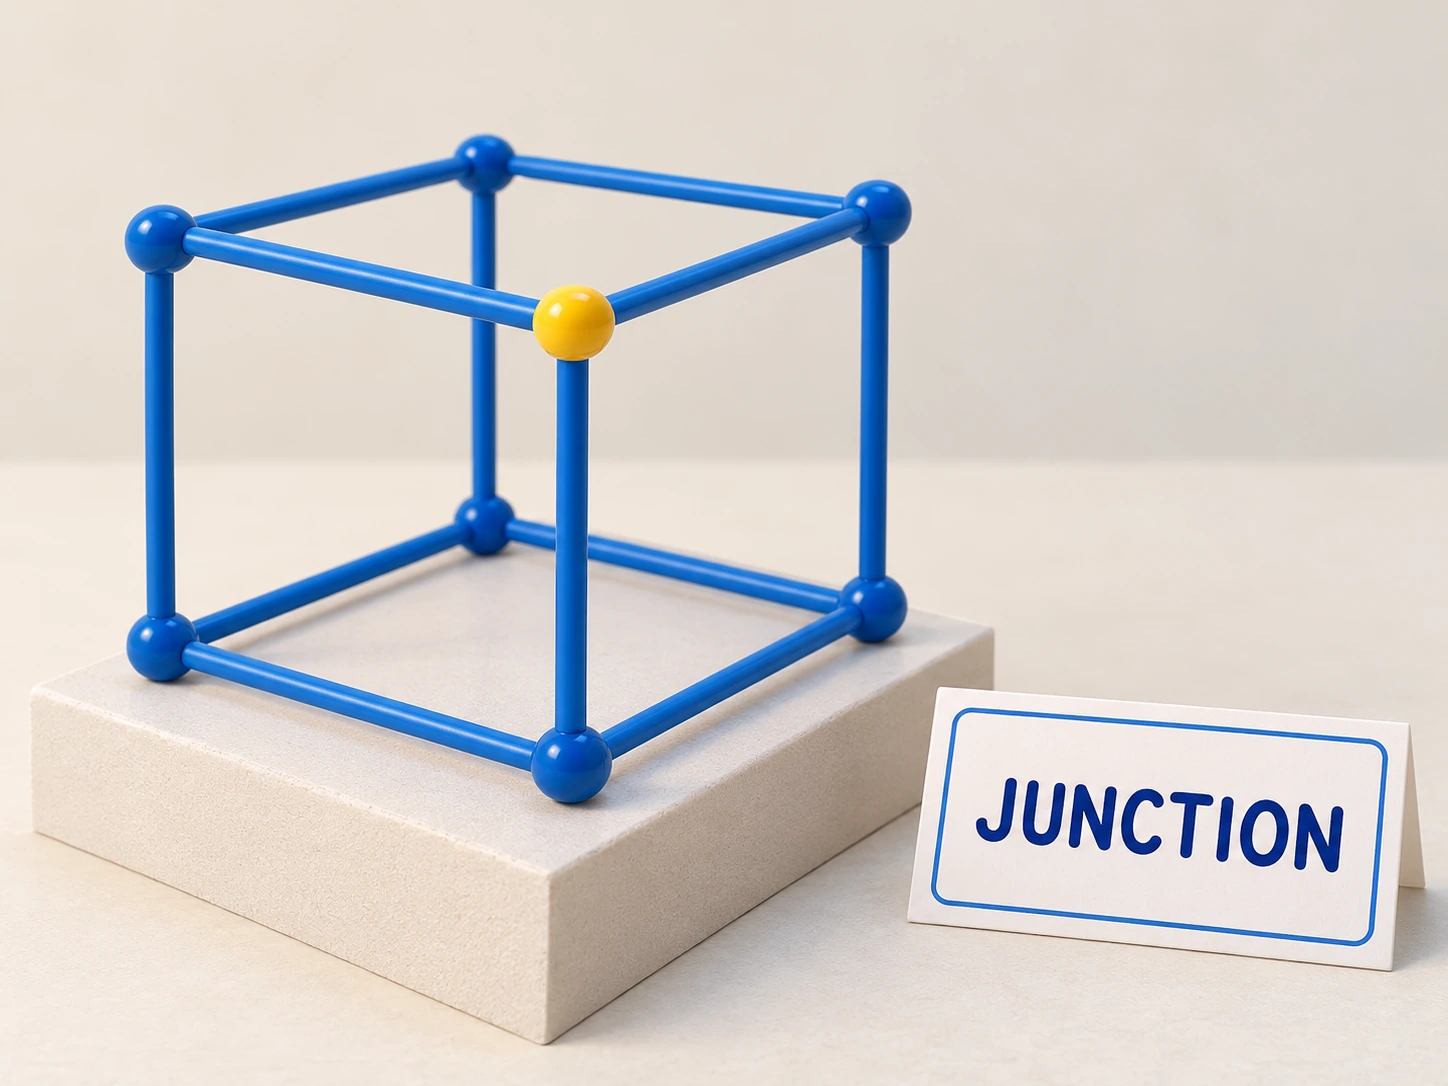
A cube-like picture contains more information than its outside border. In Cube Corner Mapping, lines can meet at a central or offset junction and suggest different faces. Ask the child to find that meeting place before tracing a course around the perimeter. It gives the model a useful internal landmark.
The source's designs vary. Some close more of the outer hexagon, while another leaves an edge open or adds a downward central stem. Cube Corner Mapping therefore asks for a fresh inspection of each blue model. Copying the same familiar cube four times would overlook the selected edges that distinguish the panels.
The pale geometry is a shared support: Cube Corner Mapping
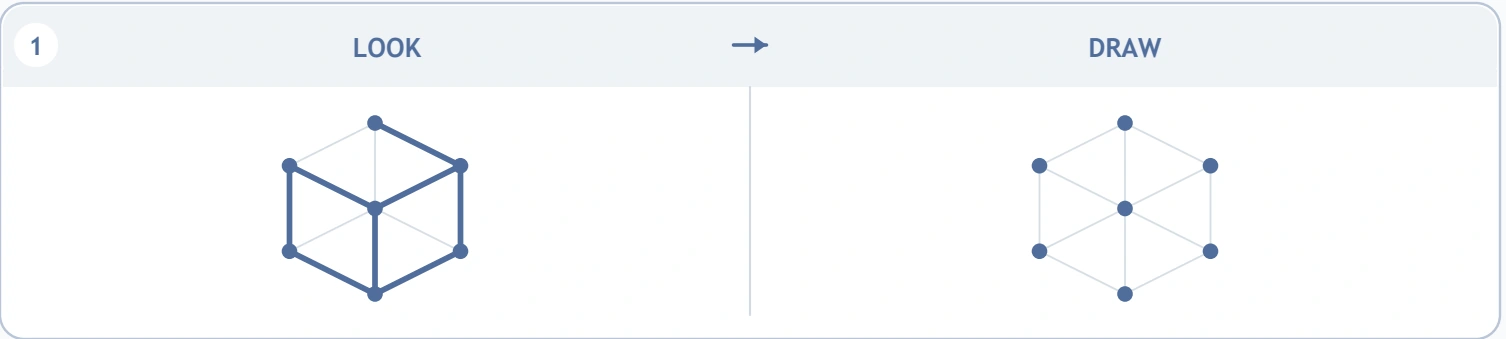
Both halves of a Cube Corner Mapping practice pair contain the full thin guide. Only the LOOK side supplies the intended heavy-line pattern. Explain that a pale connection can stay visible without being copied in dark pencil. A guide is useful precisely because it shows positions beyond the selected answer.
Show a single bold edge beside a neighbouring light edge. Let the learner point to its counterpart on DRAW. Use the scaffold to locate a connection, then check whether the model selects it. This distinction is especially helpful when a child wants to make the drawing look more complete by strengthening every available cube edge.
Four designs with different inner joins: Cube Corner Mapping
| Cube Corner Mapping pair | Visible Cube Corner Copies model | Model structure |
|---|---|---|
| 1 | Cube-like outline with a missing outer top-left edge | 7 anchors / 8 bold pieces in Cube Corner Copies |
| 2 | Closed hexagon and three central spokes | 7 anchors / 9 bold pieces in Cube Corner Copies |
| 3 | Hexagon with an off-centre three-way join | 7 anchors / 8 bold pieces in Cube Corner Copies |
| 4 | Upper outline and downward centre stem | 7 anchors / 7 bold pieces in Cube Corner Copies |
The Cube Corner Mapping structure counts describe the bold segments, excluding the faint supporting network. A child can make several connected strokes together or lift the pencil when convenient. There is no compulsory uninterrupted route around these models, and the sheet does not ask for the construction of a physical three-dimensional cube.
What makes the drawing look cube-like?: Cube Corner Mapping
The sloping edges and shared corners suggest different faces on a flat page. An adult can compare them with a large block or box while making clear that Cube Corner Mapping is about the printed line relationships. The drawing does not need shading, hidden extra edges or a realistic perspective correction.
Invite the child to describe which strokes appear to join at the same point. On Cube Corner Mapping, those joins must transfer to the corresponding guide positions. A line that ends beside a junction instead of at it changes the arrangement, even if the overall picture still reminds the learner of a box.
Six observations for an adult learning partner: Cube Corner Mapping
- Internal landmarks. The child uses a shared join rather than relying only on the model's outside boundary.
- Edge selection. A thin guide connection remains untraced when LOOK does not show it as part of the bold design.
- Orientation. Upper and lower edges retain their positions instead of being flipped into a preferred cube image.
- Endpoint control. Several strokes can arrive at a common anchor without stopping beside it or extending through it.
- Part grouping. The learner breaks an intricate-looking picture into a perimeter piece and a few central connections.
- Spatial explanation. Words such as face, junction, upper edge and inner corner support a specific conversation about a mark.
These are useful things to notice during Cube Corner Mapping, not a checklist a child must satisfy in one sitting. Pencil confidence and spoken vocabulary can develop at different rates. Allow pointing, a partial attempt or an adult demonstration on separate paper when those forms of support clarify the next decision.
Choose a practical starting level
Later-preschool pupils and early-primary children may try Cube Corner Mapping with help, although its inner joins may demand more attention than a simple square. Look for comfort with short slants and interest in comparing two neighbouring diagrams. Formal knowledge of a cube's faces or edges is unnecessary for beginning the copy.
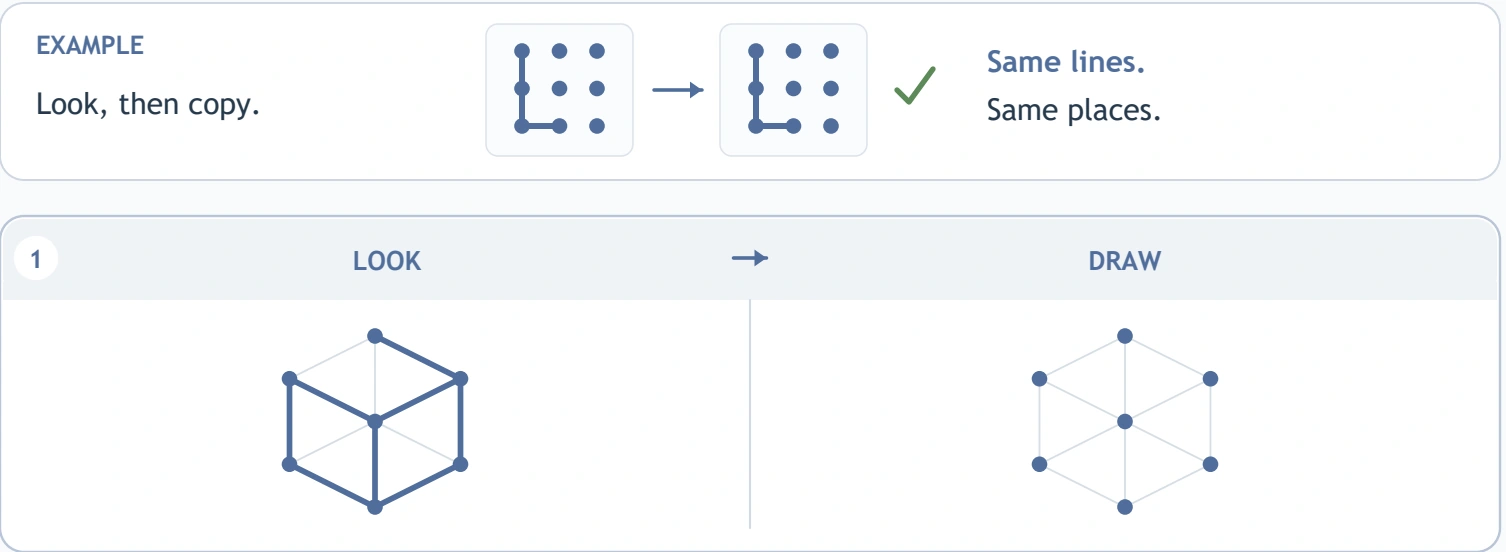
Print a single page, read the directions and inspect the L-shaped demonstration together. The sample shows how matching positions work. Then select one cube-like model and point to its most noticeable junction. If the child cannot yet distinguish bold from pale lines, explore that visual difference before requesting several copied connections.
Copy a face-sized piece, then look inward
For Cube Corner Mapping, identify two anchors belonging to one clear edge. Locate them in DRAW and connect them. Add a nearby selected edge, then compare the little group with LOOK. Once an outer portion is established, return to the internal junction and decide which spokes or stems belong there.
Do not assume the drawing can always be completed by travelling around the outside first. Some details need a separate start. A pencil lift is a sensible planning action. Pause after a few edges and check whether the junction sits at the intended location; repairing a small group is clearer than discovering several misplaced joins at the very end.
Hana's block shelf, imagined at home: Cube Corner Mapping
Imagine Hana examining a toy cube with a family member. They can touch three edges that meet at a corner, then look at Cube Corner Mapping's flat blue lines. Hana points to the central join but adds one extra scaffold edge because it makes the picture look more like the block.
This home illustration is fictional. The adult can acknowledge the realistic idea while returning to the selected paper model. They compare whether the extra connection is bold in LOOK. Cube Corner Mapping remains an exact copying task, while a separate drawing of Hana's own cube can include any additional edges the child wants to explore.
A classroom corner-construction discussion: Cube Corner Mapping
In a possible classroom use of Cube Corner Mapping, the teacher brings a large block and asks a small group where its edges meet. Children then inspect one printed junction without needing to reproduce the physical object. Each receives a personal copy and chooses a short group of model edges.
The adult watches how children transfer the join and leaves the model available throughout. A learner who explains an untraced pale edge has made a useful selection decision. Record that observation directly. Avoid treating Cube Corner Mapping as a perspective-drawing lesson or ranking children by whether their final blue-looking box appears the most realistic.
Five construction-table extensions: Cube Corner Mapping
Build a junction with broad sticks: Cube Corner Mapping
Arrange three sticks so they share one large central token. A partner recreates their directions using another token and sticks. Change one branch and compare the constructions. This tangible meeting place can make an inner Cube Corner Mapping join easier to discuss.
Label a box inspection: Cube Corner Mapping
Choose a cardboard box and use completed paper labels for corner and edge. A grown-up records the explanation as the learner gestures to examples. Keep the physical inspection playful and separate from any demand to count every face or edge.
Curate selected edges
Lay a light guide on a large mat and cover only a few connections with dark paper strips. A partner selects the same connections on another guide. The extension mirrors the choice involved in Cube Corner Mapping while changing the scale and material.
Tell a tiny builder's story: Cube Corner Mapping
Let a toy builder inspect a model and announce which corner needs checking. The child provides the builder's words and a partner points to the proposed place. A short story can give precise spatial language a reason to be used.
Compare a drawing with an invention: Cube Corner Mapping
After copying one Cube Corner Mapping model, draw a freely imagined box on another sheet. Discuss which task allowed extra edges and which required matching a reference. Both activities can be enjoyable, and making their purposes explicit protects the value of each.
When the inside corner drifts: Cube Corner Mapping
A misplaced junction in Cube Corner Mapping can pull several otherwise sensible edges out of alignment. Compare the central anchor first, then follow each selected edge away from it. If the anchor is correct but one branch lands wrongly, focus the repair on that branch instead of redrawing the complete model.
Other common mix-ups include tracing every pale line, reflecting the picture, adding a missing-looking outer edge or extending a stem too far. The bold reference is the final guide. Ask the child to show the matching source stroke. A brief pause to inspect it is more useful than repeated instructions to draw more carefully.
Make return visits about a chosen join
The cube illusion can invite curiosity: how can a few lines suggest a solid object? Let that question make Cube Corner Mapping appealing, while accepting a child's own description of the shape. It might resemble a roof, a box or a cluster of windows. The copying relationship remains the same whatever name the learner prefers.
For regular practice, revisit a single junction and discuss one new strategy. “You checked the inside before adding another edge” recognises planning. Alternate Cube Corner Mapping with block play and allow sessions to end after a small success, preserving willingness to inspect another model on a later day.
Download the flat-page activity
The original Cube Corner Copies sample is available through the free file option. For Cube Corner Mapping's clean premium PDF, request the member file after confirming that your current account membership qualifies. Website watermarks, domain text and promotional ads are removed from that member file; the faint guide remains part of the preserved activity.
The related collection card opens the thirty-sheet $3 package for a separate purchase. Save the authorised PDF, choose US Letter and print at Actual Size or 100%. Review one test sheet if thin lines look faint on your printer. Retaining Cube Corner Mapping's complete page and original spacing makes its inner junctions easier to compare.
Continue exploring visual structure: Cube Corner Mapping
Compare Cube Corner Mapping with Path Copy Thinking. After Cube Corner Copies, try Drawing Size Choices. For Cube Corner Copies, consider Shape Border Journeys.
For construction and play ideas alongside Cube Corner Mapping, adults may consult NAEYC's family guidance about play. Another source of everyday learning suggestions is PBS Parents Learn and Grow activities. These outside educational resources are optional and are not additional components of this PDF.
Popular Worksheets
Printable resources families and teachers are downloading now.
 Free
 Free
 Free
 Free