
Robot Repair Codes: 5 Amazing Part-to-Part Missions
Give the robot workshop 24 companion pages for $3. The clean combined file includes these part-to-part routes and the remaining supplied themes, each using its own key and printed destination order.
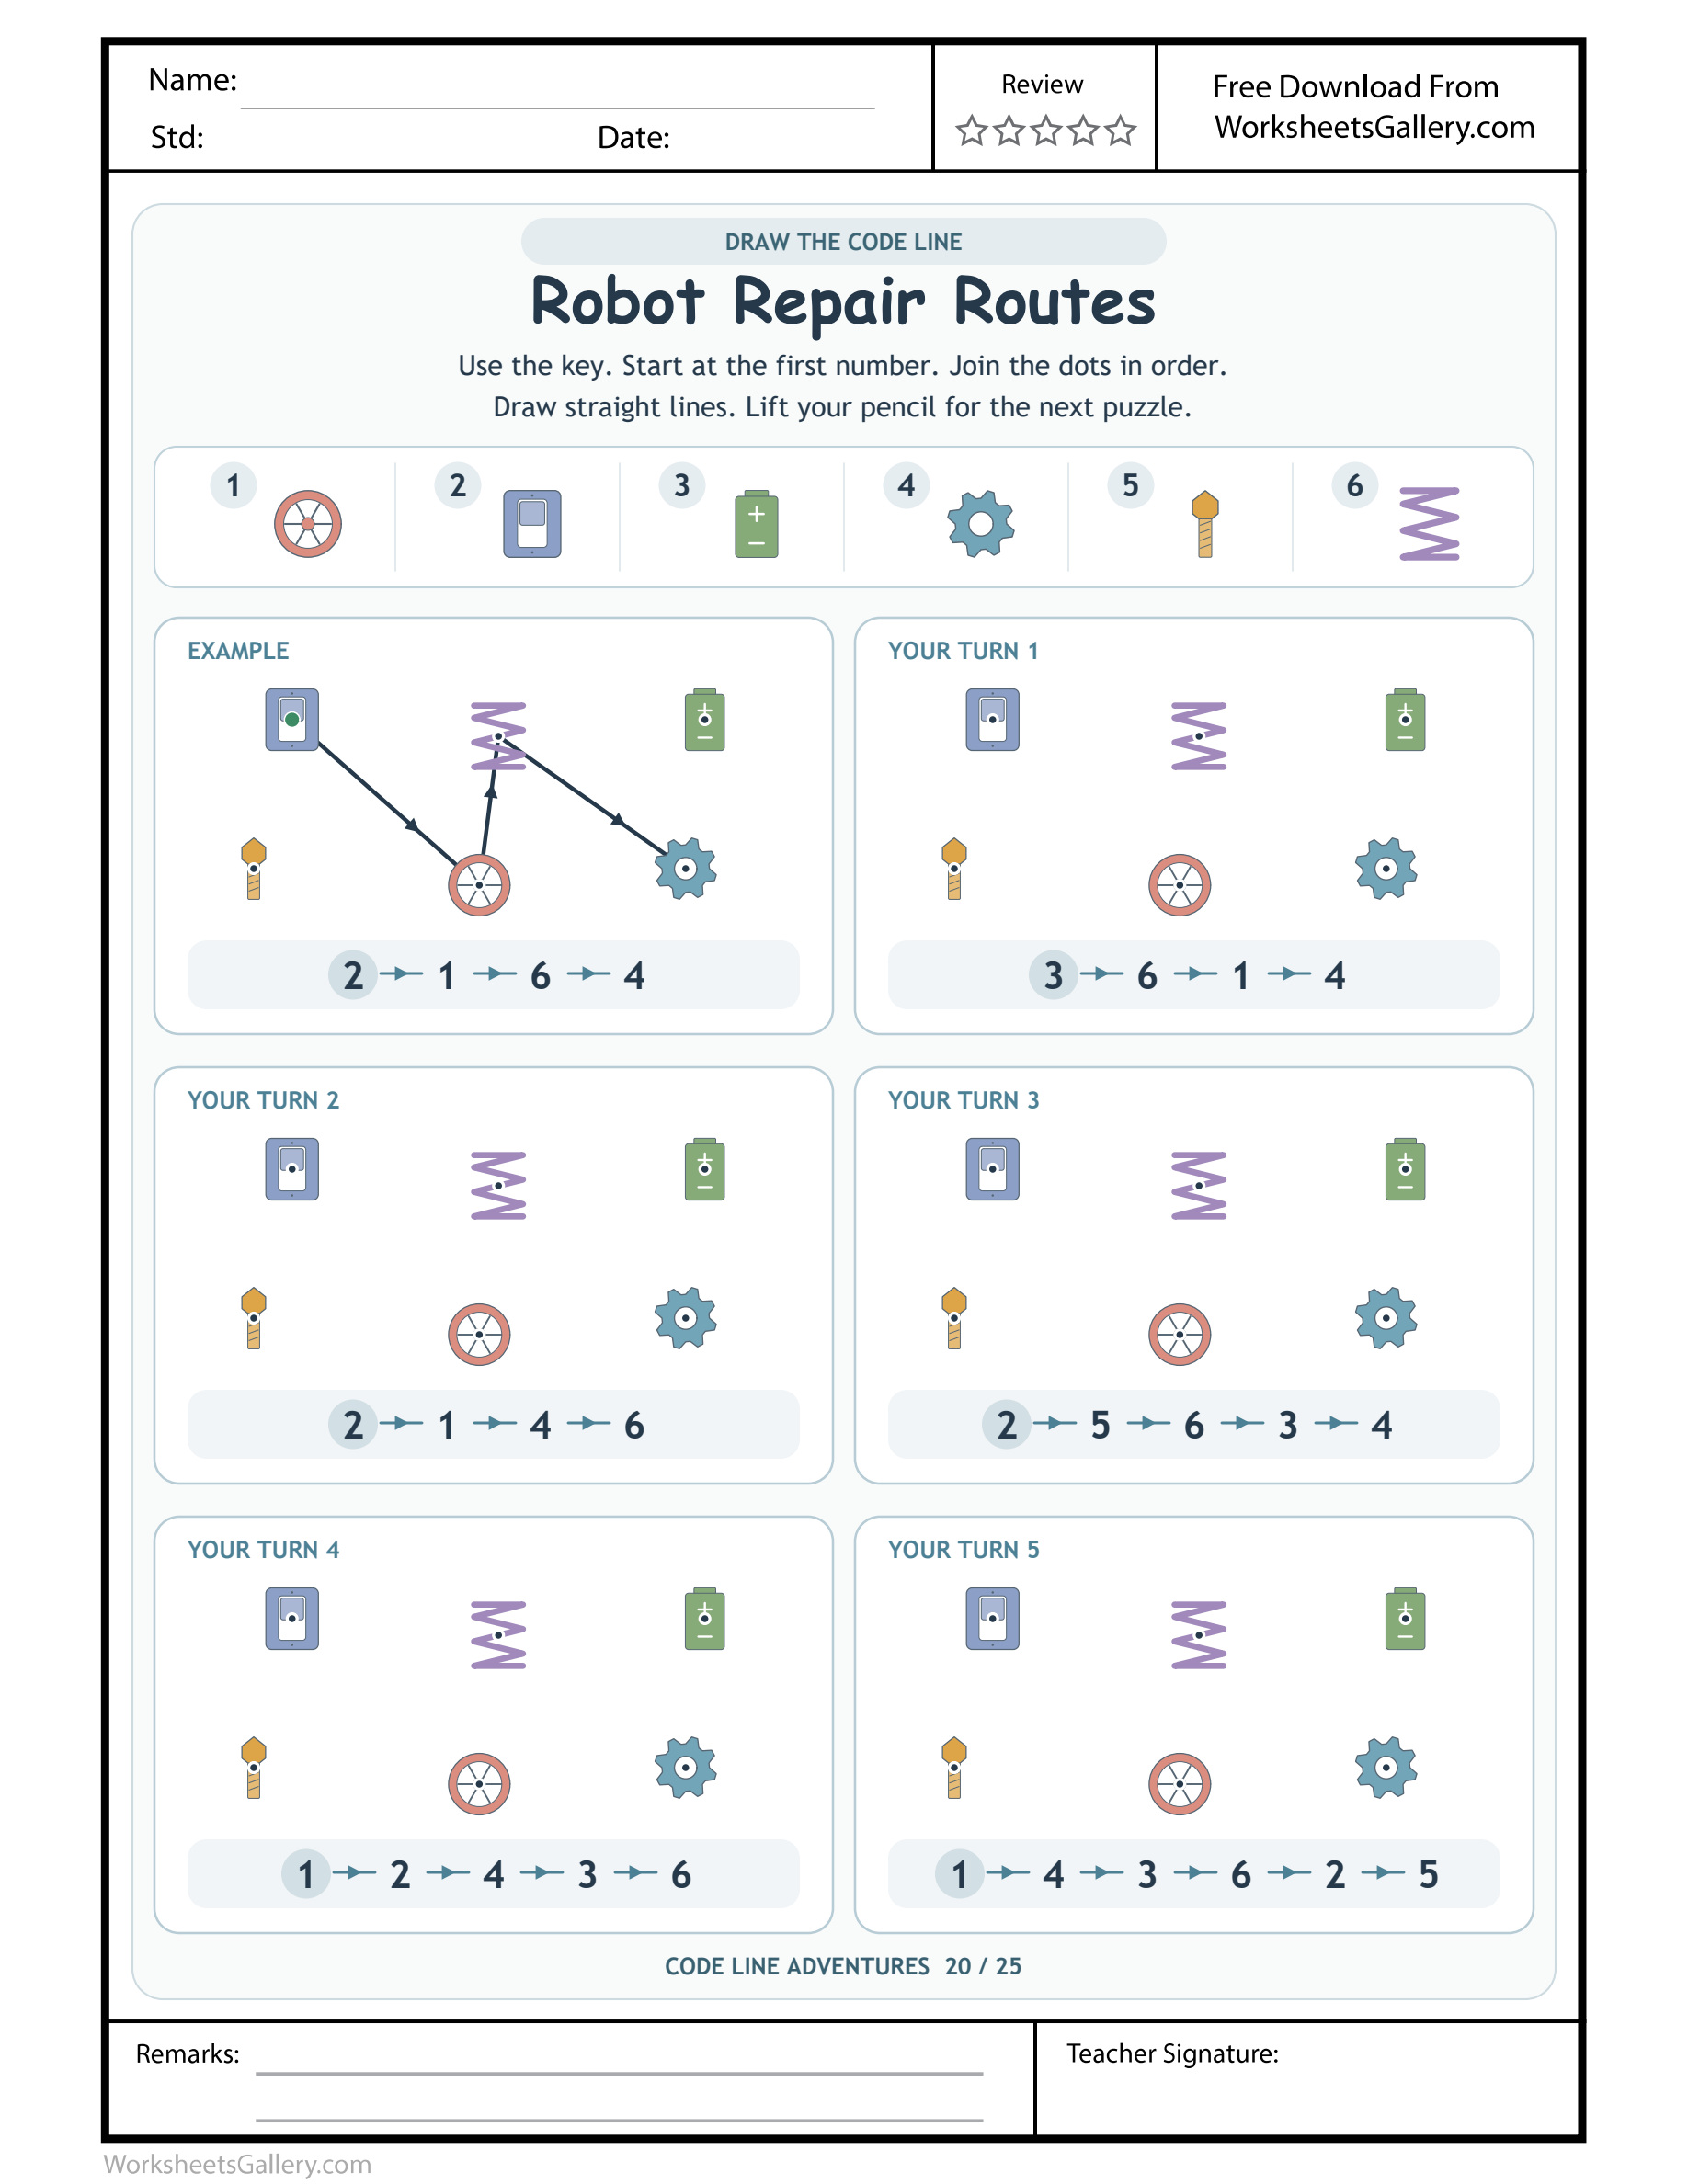
The robot needs a route through its pictured parts, not a real electrical repair. Robot Repair Codes assigns numerals to wheel, switch, battery, gear, bolt and spring, then gives children five ordered drawing instructions. They consult the key and connect the matching centre dots with straight strokes. A compact example shows one completed path before the independent panels. The workshop theme offers an engaging reason to give precise directions, while the actual learning task stays clear: choose the part named by the current code, plan the next connection and stop when that instruction ends.
Introduce the parts as picture destinations — Robot Repair Codes
Some Robot Repair Codes words may be unfamiliar. Point to spring, gear and bolt in the legend and supply their names without requiring a lesson about mechanical functions. A child can accurately select the coiled picture while still learning the word spring. The symbol match is observable through pointing.
The Robot Repair Codes lines do not describe a safe or working electrical circuit. They are centre-to-centre routes through illustrated parts. Follow the printed code rather than inventing an assembly order. A robot story can accompany the task without changing which numeral selects a particular picture.
Robot Repair Codes legend at a glance
| Robot Repair Routes numeral | Keyed picture |
|---|---|
| 1 | wheel |
| 2 | switch |
| 3 | battery |
| 4 | gear |
| 5 | bolt |
| 6 | spring |

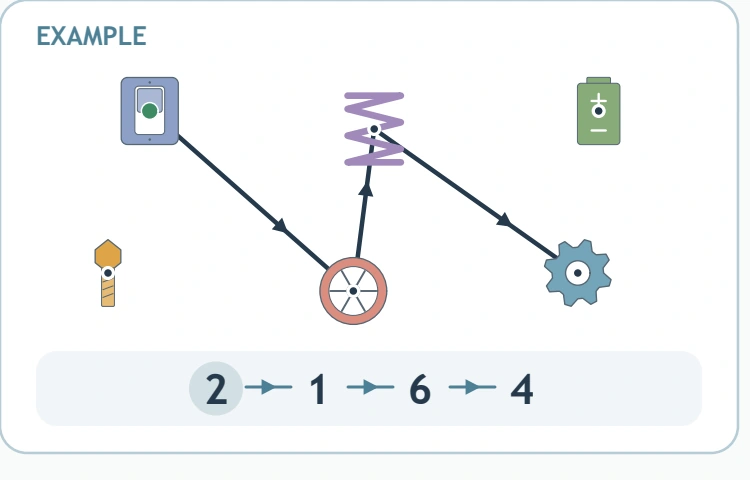
Robot Repair Routes example before independent drawing
Robot Repair Routes demonstrates 2 → 1 → 6 → 4. The Robot Repair Routes itinerary is switch → wheel → spring → gear. In Robot Repair Routes, the green start selects switch. Robot Repair Routes arrows lead to gear. Robot Repair Routes has 3 worked segments. The Robot Repair Codes example supports finger rehearsal. Inspect the Robot Repair Routes practice strip separately.
Robot Repair Routes — practice 1
Practice 1 on Robot Repair Routes: 3 → 6 → 1 → 4. Translate those Robot Repair Codes destinations as battery → spring → wheel → gear. Begin on battery for Robot Repair Routes; next locate spring. The Robot Repair Routes centre-to-centre connections are battery → spring; spring → wheel; wheel → gear. Segment count for Robot Repair Codes: 3, from 4 listed stops. The Robot Repair Routes endpoint is gear. Against the Robot Repair Routes strip, verify final 4.
Robot Repair Codes leaves switch, bolt outside practice 1. Leave these Robot Repair Routes alternatives unvisited. Practice 1 for Robot Repair Routes requests 3 → 6 → 1 → 4.
Robot Repair Routes — practice 2
Practice 2 on Robot Repair Routes: 2 → 1 → 4 → 6. Translate those Robot Repair Codes destinations as switch → wheel → gear → spring. Begin on switch for Robot Repair Routes; next locate wheel. The Robot Repair Routes centre-to-centre connections are switch → wheel; wheel → gear; gear → spring. Segment count for Robot Repair Codes: 3, from 4 listed stops. The Robot Repair Routes endpoint is spring. Against the Robot Repair Routes strip, verify final 6.
Robot Repair Codes leaves battery, bolt outside practice 2. Leave these Robot Repair Routes alternatives unvisited. Practice 2 for Robot Repair Routes requests 2 → 1 → 4 → 6.
Robot Repair Routes — practice 3
Practice 3 on Robot Repair Routes: 2 → 5 → 6 → 3 → 4. Translate those Robot Repair Codes destinations as switch → bolt → spring → battery → gear. Begin on switch for Robot Repair Routes; next locate bolt. The Robot Repair Routes centre-to-centre connections are switch → bolt; bolt → spring; spring → battery; battery → gear. Segment count for Robot Repair Codes: 4, from 5 listed stops. The Robot Repair Routes endpoint is gear. Against the Robot Repair Routes strip, verify final 4.
Robot Repair Codes leaves wheel outside practice 3. Leave these Robot Repair Routes alternatives unvisited. Practice 3 for Robot Repair Routes requests 2 → 5 → 6 → 3 → 4.
Robot Repair Routes — practice 4
Practice 4 on Robot Repair Routes: 1 → 2 → 4 → 3 → 6. Translate those Robot Repair Codes destinations as wheel → switch → gear → battery → spring. Begin on wheel for Robot Repair Routes; next locate switch. The Robot Repair Routes centre-to-centre connections are wheel → switch; switch → gear; gear → battery; battery → spring. Segment count for Robot Repair Codes: 4, from 5 listed stops. The Robot Repair Routes endpoint is spring. Against the Robot Repair Routes strip, verify final 6.
Robot Repair Codes leaves bolt outside practice 4. Leave these Robot Repair Routes alternatives unvisited. Practice 4 for Robot Repair Routes requests 1 → 2 → 4 → 3 → 6.
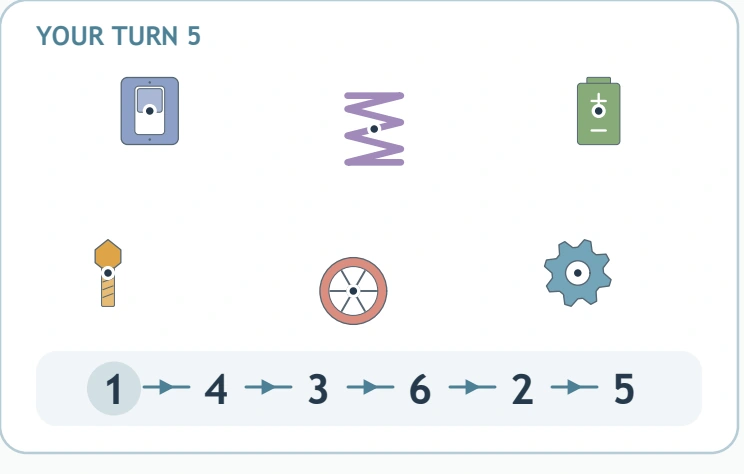
Robot Repair Routes — practice 5
Practice 5 on Robot Repair Routes: 1 → 4 → 3 → 6 → 2 → 5. Translate those Robot Repair Codes destinations as wheel → gear → battery → spring → switch → bolt. Begin on wheel for Robot Repair Routes; next locate gear. The Robot Repair Routes centre-to-centre connections are wheel → gear; gear → battery; battery → spring; spring → switch; switch → bolt. Segment count for Robot Repair Codes: 5, from 6 listed stops. The Robot Repair Routes endpoint is bolt. Against the Robot Repair Routes strip, verify final 5.
Robot Repair Routes uses every Robot Repair Codes entry in practice 5 of Robot Repair Routes: 1 → 4 → 3 → 6 → 2 → 5. First Robot Repair Routes selection: wheel; final selection: bolt.
A workshop at home, imagined
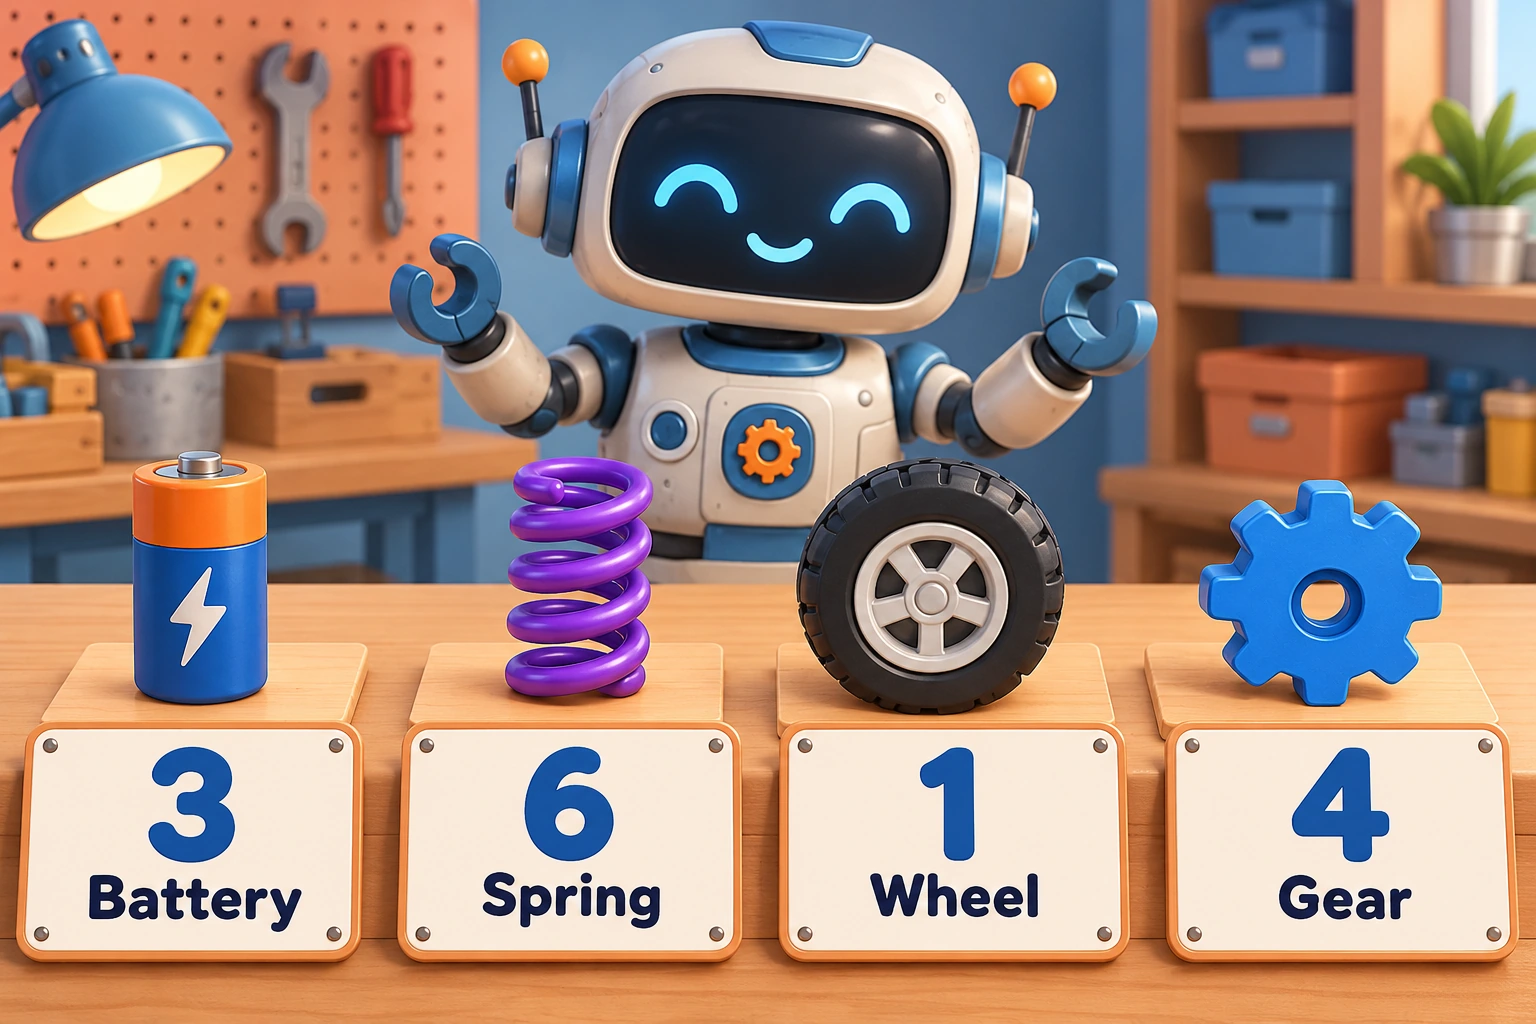
Imagine Uri studying Robot Repair Codes with a caregiver. He calls the spring “the curly thing.” The adult accepts his correct point, adds spring and shows six in the legend. Uri can now describe the first practice route's opening pair using battery and spring, with the picture reference still available.
Uri later tries to connect the Robot Repair Codes battery directly to wheel because he thinks a robot needs power. His caregiver acknowledges the story, then asks which numeral follows battery in the selected strip. They return to that specific instruction and keep an invented robot design for separate paper afterwards.
Six useful workshop habits
Name a part precisely enough to find
The Robot Repair Codes legend makes vocabulary practical. Saying gear distinguishes one symbol from wheel, while a point can communicate the same choice. Adults can add the exact term naturally, with no requirement to repeat a long definition before drawing.
Use supplied instructions before a plausible story
A convincing robot narrative can still produce a wrong Robot Repair Codes route. Checking the numeral strip keeps the response tied to the actual task. Ask for the printed evidence selecting the next part rather than debating how a real robot should be built.
Plan one part-to-part connection
During Robot Repair Codes, find the present and next centres before moving the pencil. That pair gives the hand a definite target. A controlled approach matters more than a perfectly rigid line, and a small wobble can coexist with accurate decoding.
Retain the current instruction position
A spare finger can track the Robot Repair Codes strip while the eyes consult the key. This separates remembering a place from choosing a symbol. Let the child take over the tracking when ready instead of withholding the reference to test memory.
Leave optional pictures untouched
Some Robot Repair Codes routes omit available parts. Their presence does not require an extra visit. The child can compare the Robot Repair Routes symbol with the entries actually supplied, connecting selective action with a visible reason.
Repair a small disagreement
Review a Robot Repair Codes line by comparing its two part pictures with adjacent numerals. If they disagree, identify the first local mismatch. Correcting one connection preserves the rest of the child's work and makes the explanation easier to follow.
Adapt the demand to the learner
Children roughly four to seven can approach Robot Repair Codes with support for number names, part vocabulary or hand control. Read numerals aloud when needed. A child who selects the right part but tires while drawing can demonstrate the route with a finger before another pencil movement is requested.
Use Robot Repair Codes on a stable surface and keep the legend accessible. Inspect the existing example arrows, identify the opening pair in a selected Robot Repair Routes field. Connect their centres, read the next entry and lift before another Robot Repair Routes box. Pause after a short mission if concentration or grip comfort begins to diminish.
A classroom repair briefing, imagined
Picture a teacher using Robot Repair Codes at a small-group pretend workshop. One child gives a brief numeral-and-part direction, while a partner points on their own sheet. The teacher models wheel versus gear when those words become interchangeable, then lets each child draw an individual connection.
As children work through Robot Repair Codes, the teacher observes whether errors come from vocabulary, numeral lookup or aiming. She offers a targeted clue instead of taking over the pencil. The group shares one checked decision at the end, without a competition to finish every repair route.
Four robot extensions for separate play
Give a toy technician a short itinerary
Set out large clearly labelled part cards inspired by Robot Repair Codes. Ask a toy to visit two named stations, then let the child give the next instruction. Keep the cards as pretend pictures, using no real batteries, tools or small loose parts for the game.
Describe a part by its outline
After Robot Repair Codes, offer a visible clue such as coils, teeth or a round rim. A partner finds the matching legend entry and numeral. Add the part name after the identification, supporting vocabulary without introducing technical repair claims.
Distinguish a drawing route from a robot design
Tell a story around a completed Robot Repair Codes itinerary, then sketch an invented robot on separate paper if the child wishes. Discuss how the worksheet follows a supplied order while the design is open to choices. Both activities can be enjoyable with their purposes kept clear.
Help a puppet skip an unrequested part
A puppet adds a favourite gear to a Robot Repair Codes route that does not request it. The child checks the strip and explains whether four appears. The puppet retries using the actual itinerary, giving restraint a useful role in the workshop story.
Keep a workshop mistake recoverable
Common Robot Repair Codes slips include following a guessed assembly order, confusing wheel with gear or tracing a part's outline. Return to the relevant key entry and little centre target. If the picture match is sound, practise the stroke; if the symbol is wrong, compare those specific entries before drawing again.
Invite short Robot Repair Codes sessions after robot pretend play or a story. Let one panel be enough and welcome requests for a clue. A precise direction is worth noticing. Describe the checked part or controlled landing rather than comparing the child's speed with someone else's finished page.
Download the robot-part route
Choose the original Robot Repair Routes worksheet through its sample control. A signed-in user with eligible active membership access can obtain its cleaned premium PDF; the printable removes domain branding and watermarks and carries no ads. The complete set includes Robot Repair Routes at a $3 price containing the twenty-five supplied pages.
Save Robot Repair Codes and check its portrait printing preview for the full frame and upper legend. Clear colour makes the small part pictures easier to compare. Test a single copy and adjust fitting if your printer clips an edge before producing more sheets.
Other ways to follow pictured instructions
Compare Robot Repair Codes with Exact Path Detective. After Robot Repair Routes, try Castle Color Codes. For Robot Repair Routes, consider Number Letter Switching.
Adults extending Robot Repair Codes may find general learning ideas through NAEYC's family resources for play and PBS Parents' educational resource library. Choose optional shared activities while this worksheet's own part legend continues to decide its drawn routes.
Popular Worksheets
Printable resources families and teachers are downloading now.
 Free
 Free
 Free
 Free